- ubuntu12.04环境下使用kvm ioctl接口实现最简单的虚拟机
- Ubuntu 通过无线网络安装Ubuntu Server启动系统后连接无线网络的方法
- 在Ubuntu上搭建网桥的方法
- ubuntu 虚拟机上网方式及相关配置详解
CFSDN坚持开源创造价值,我们致力于搭建一个资源共享平台,让每一个IT人在这里找到属于你的精彩世界.
这篇CFSDN的博客文章Pytorch使用MNIST数据集实现基础GAN和DCGAN详解由作者收集整理,如果你对这篇文章有兴趣,记得点赞哟.
原始生成对抗网络Generative Adversarial Networks GAN包含生成器Generator和判别器Discriminator,数据有真实数据groundtruth,还有需要网络生成的“fake”数据,目的是网络生成的fake数据可以“骗过”判别器,让判别器认不出来,就是让判别器分不清进入的数据是真实数据还是fake数据。总的来说是:判别器区分真实数据和fake数据的能力越强越好;生成器生成的数据骗过判别器的能力越强越好,这个是矛盾的,所以只能交替训练网络.
需要搭建生成器网络和判别器网络,训练的时候交替训练.
首先训练判别器的参数,固定生成器的参数,让判别器判断生成器生成的数据,让其和0接近,让判别器判断真实数据,让其和1接近; 。
接着训练生成器的参数,固定判别器的参数,让生成器生成的数据进入判别器,让判断结果和1接近。生成器生成数据需要给定随机初始值 。
线性版:
|
1
2
3
4
5
6
7
8
9
10
11
12
13
14
15
16
17
18
19
20
21
22
23
24
25
26
27
28
29
30
31
32
33
34
35
36
37
38
39
40
41
42
43
44
45
46
47
48
49
50
51
52
53
54
55
56
57
58
59
60
61
62
63
64
65
66
67
68
69
70
71
72
73
74
75
76
77
78
79
80
81
82
83
84
85
86
87
88
89
90
91
92
93
94
95
96
97
98
99
100
101
102
103
104
105
106
107
108
109
110
111
112
113
114
115
116
117
118
119
120
121
122
123
124
125
126
127
128
129
130
131
132
133
134
|
import
torch
from
torch.utils.data
import
DataLoader
from
torchvision.datasets
import
MNIST
from
torchvision
import
transforms
from
torch
import
optim
import
torch.nn as nn
import
matplotlib.pyplot as plt
import
numpy as np
import
matplotlib.gridspec as gridspec
def
showimg(images,count):
images
=
images.detach().numpy()[
0
:
16
,:]
images
=
255
*
(
0.5
*
images
+
0.5
)
images
=
images.astype(np.uint8)
grid_length
=
int
(np.ceil(np.sqrt(images.shape[
0
])))
plt.figure(figsize
=
(
4
,
4
))
width
=
int
(np.sqrt((images.shape[
1
])))
gs
=
gridspec.GridSpec(grid_length,grid_length,wspace
=
0
,hspace
=
0
)
# gs.update(wspace=0, hspace=0)
print
(
'starting...'
)
for
i, img
in
enumerate
(images):
ax
=
plt.subplot(gs[i])
ax.set_xticklabels([])
ax.set_yticklabels([])
ax.set_aspect(
'equal'
)
plt.imshow(img.reshape([width,width]),cmap
=
plt.cm.gray)
plt.axis(
'off'
)
plt.tight_layout()
print
(
'showing...'
)
plt.tight_layout()
plt.savefig(
'./GAN_Image/%d.png'
%
count, bbox_inches
=
'tight'
)
def
loadMNIST(batch_size):
#MNIST图片的大小是28*28
trans_img
=
transforms.Compose([transforms.ToTensor()])
trainset
=
MNIST(
'./data'
,train
=
True
,transform
=
trans_img,download
=
True
)
testset
=
MNIST(
'./data'
,train
=
False
,transform
=
trans_img,download
=
True
)
# device = torch.device("cuda:0" if torch.cuda.is_available() else "cpu")
trainloader
=
DataLoader(trainset,batch_size
=
batch_size,shuffle
=
True
,num_workers
=
10
)
testloader
=
DataLoader(testset, batch_size
=
batch_size, shuffle
=
False
, num_workers
=
10
)
return
trainset,testset,trainloader,testloader
class
discriminator(nn.Module):
def
__init__(
self
):
super
(discriminator,
self
).__init__()
self
.dis
=
nn.Sequential(
nn.Linear(
784
,
300
),
nn.LeakyReLU(
0.2
),
nn.Linear(
300
,
150
),
nn.LeakyReLU(
0.2
),
nn.Linear(
150
,
1
),
nn.Sigmoid()
)
def
forward(
self
, x):
x
=
self
.dis(x)
return
x
class
generator(nn.Module):
def
__init__(
self
,input_size):
super
(generator,
self
).__init__()
self
.gen
=
nn.Sequential(
nn.Linear(input_size,
150
),
nn.ReLU(
True
),
nn.Linear(
150
,
300
),
nn.ReLU(
True
),
nn.Linear(
300
,
784
),
nn.Tanh()
)
def
forward(
self
, x):
x
=
self
.gen(x)
return
x
if
__name__
=
=
"__main__"
:
criterion
=
nn.BCELoss()
num_img
=
100
z_dimension
=
100
D
=
discriminator()
G
=
generator(z_dimension)
trainset, testset, trainloader, testloader
=
loadMNIST(num_img)
# data
d_optimizer
=
optim.Adam(D.parameters(),lr
=
0.0003
)
g_optimizer
=
optim.Adam(G.parameters(),lr
=
0.0003
)
'''
交替训练的方式训练网络
先训练判别器网络D再训练生成器网络G
不同网络的训练次数是超参数
也可以两个网络训练相同的次数
这样就可以不用分别训练两个网络
'''
count
=
0
#鉴别器D的训练,固定G的参数
epoch
=
100
gepoch
=
1
for
i
in
range
(epoch):
for
(img, label)
in
trainloader:
# num_img=img.size()[0]
real_img
=
img.view(num_img,
-
1
)
#展开为28*28=784
real_label
=
torch.ones(num_img)
#真实label为1
fake_label
=
torch.zeros(num_img)
#假的label为0
#compute loss of real_img
real_out
=
D(real_img)
#真实图片送入判别器D输出0~1
d_loss_real
=
criterion(real_out,real_label)
#得到loss
real_scores
=
real_out
#真实图片放入判别器输出越接近1越好
#compute loss of fake_img
z
=
torch.randn(num_img,z_dimension)
#随机生成向量
fake_img
=
G(z)
#将向量放入生成网络G生成一张图片
fake_out
=
D(fake_img)
#判别器判断假的图片
d_loss_fake
=
criterion(fake_out,fake_label)
#假的图片的loss
fake_scores
=
fake_out
#假的图片放入判别器输出越接近0越好
#D bp and optimize
d_loss
=
d_loss_real
+
d_loss_fake
d_optimizer.zero_grad()
#判别器D的梯度归零
d_loss.backward()
#反向传播
d_optimizer.step()
#更新判别器D参数
#生成器G的训练compute loss of fake_img
for
j
in
range
(gepoch):
fake_label
=
torch.ones(num_img)
# 真实label为1
z
=
torch.randn(num_img, z_dimension)
# 随机生成向量
fake_img
=
G(z)
# 将向量放入生成网络G生成一张图片
output
=
D(fake_img)
# 经过判别器得到结果
g_loss
=
criterion(output, fake_label)
#得到假的图片与真实标签的loss
#bp and optimize
g_optimizer.zero_grad()
#生成器G的梯度归零
g_loss.backward()
#反向传播
g_optimizer.step()
#更新生成器G参数
print
(
'Epoch [{}/{}], d_loss: {:.6f}, g_loss: {:.6f} '
'D real: {:.6f}, D fake: {:.6f}'
.
format
(
i, epoch, d_loss.data[
0
], g_loss.data[
0
],
real_scores.data.mean(), fake_scores.data.mean()))
showimg(fake_img,count)
# plt.show()
count
+
=
1
|
这里的图分别是 epoch为0、50、100、150、190的运行结果,可以看到图片中的数字并不单一 。

卷积版 Deep Convolutional Generative Adversarial Networks:
|
1
2
3
4
5
6
7
8
9
10
11
12
13
14
15
16
17
18
19
20
21
22
23
24
25
26
27
28
29
30
31
32
33
34
35
36
37
38
39
40
41
42
43
44
45
46
47
48
49
50
51
52
53
54
55
56
57
58
59
60
61
62
63
64
65
66
67
68
69
70
71
72
73
74
75
76
77
78
79
80
81
82
83
84
85
86
87
88
89
90
91
92
93
94
95
96
97
98
99
100
101
102
103
104
105
106
107
108
109
110
111
112
113
114
115
116
117
118
119
120
121
122
123
124
125
126
127
128
129
130
131
132
133
134
135
136
137
138
139
140
141
142
143
144
145
146
147
148
149
150
151
152
153
154
155
156
157
158
159
160
161
162
163
|
import
torch
from
torch.utils.data
import
DataLoader
from
torchvision.datasets
import
MNIST
from
torchvision
import
transforms
from
torch
import
optim
import
torch.nn as nn
import
matplotlib.pyplot as plt
import
numpy as np
from
torch.autograd
import
Variable
import
matplotlib.gridspec as gridspec
import
os
def
showimg(images,count):
images
=
images.to(
'cpu'
)
images
=
images.detach().numpy()
images
=
images[[
6
,
12
,
18
,
24
,
30
,
36
,
42
,
48
,
54
,
60
,
66
,
72
,
78
,
84
,
90
,
96
]]
images
=
255
*
(
0.5
*
images
+
0.5
)
images
=
images.astype(np.uint8)
grid_length
=
int
(np.ceil(np.sqrt(images.shape[
0
])))
plt.figure(figsize
=
(
4
,
4
))
width
=
images.shape[
2
]
gs
=
gridspec.GridSpec(grid_length,grid_length,wspace
=
0
,hspace
=
0
)
print
(images.shape)
for
i, img
in
enumerate
(images):
ax
=
plt.subplot(gs[i])
ax.set_xticklabels([])
ax.set_yticklabels([])
ax.set_aspect(
'equal'
)
plt.imshow(img.reshape(width,width),cmap
=
plt.cm.gray)
plt.axis(
'off'
)
plt.tight_layout()
# print('showing...')
plt.tight_layout()
# plt.savefig('./GAN_Imaget/%d.png'%count, bbox_inches='tight')
def
loadMNIST(batch_size):
#MNIST图片的大小是28*28
trans_img
=
transforms.Compose([transforms.ToTensor()])
trainset
=
MNIST(
'./data'
,train
=
True
,transform
=
trans_img,download
=
True
)
testset
=
MNIST(
'./data'
,train
=
False
,transform
=
trans_img,download
=
True
)
# device = torch.device("cuda:0" if torch.cuda.is_available() else "cpu")
trainloader
=
DataLoader(trainset,batch_size
=
batch_size,shuffle
=
True
,num_workers
=
10
)
testloader
=
DataLoader(testset, batch_size
=
batch_size, shuffle
=
False
, num_workers
=
10
)
return
trainset,testset,trainloader,testloader
class
discriminator(nn.Module):
def
__init__(
self
):
super
(discriminator,
self
).__init__()
self
.dis
=
nn.Sequential(
nn.Conv2d(
1
,
32
,
5
,stride
=
1
,padding
=
2
),
nn.LeakyReLU(
0.2
,
True
),
nn.MaxPool2d((
2
,
2
)),
nn.Conv2d(
32
,
64
,
5
,stride
=
1
,padding
=
2
),
nn.LeakyReLU(
0.2
,
True
),
nn.MaxPool2d((
2
,
2
))
)
self
.fc
=
nn.Sequential(
nn.Linear(
7
*
7
*
64
,
1024
),
nn.LeakyReLU(
0.2
,
True
),
nn.Linear(
1024
,
1
),
nn.Sigmoid()
)
def
forward(
self
, x):
x
=
self
.dis(x)
x
=
x.view(x.size(
0
),
-
1
)
x
=
self
.fc(x)
return
x
class
generator(nn.Module):
def
__init__(
self
,input_size,num_feature):
super
(generator,
self
).__init__()
self
.fc
=
nn.Linear(input_size,num_feature)
#1*56*56
self
.br
=
nn.Sequential(
nn.BatchNorm2d(
1
),
nn.ReLU(
True
)
)
self
.gen
=
nn.Sequential(
nn.Conv2d(
1
,
50
,
3
,stride
=
1
,padding
=
1
),
nn.BatchNorm2d(
50
),
nn.ReLU(
True
),
nn.Conv2d(
50
,
25
,
3
,stride
=
1
,padding
=
1
),
nn.BatchNorm2d(
25
),
nn.ReLU(
True
),
nn.Conv2d(
25
,
1
,
2
,stride
=
2
),
nn.Tanh()
)
def
forward(
self
, x):
x
=
self
.fc(x)
x
=
x.view(x.size(
0
),
1
,
56
,
56
)
x
=
self
.br(x)
x
=
self
.gen(x)
return
x
if
__name__
=
=
"__main__"
:
criterion
=
nn.BCELoss()
num_img
=
100
z_dimension
=
100
D
=
discriminator()
G
=
generator(z_dimension,
3136
)
#1*56*56
trainset, testset, trainloader, testloader
=
loadMNIST(num_img)
# data
D
=
D.cuda()
G
=
G.cuda()
d_optimizer
=
optim.Adam(D.parameters(),lr
=
0.0003
)
g_optimizer
=
optim.Adam(G.parameters(),lr
=
0.0003
)
'''
交替训练的方式训练网络
先训练判别器网络D再训练生成器网络G
不同网络的训练次数是超参数
也可以两个网络训练相同的次数,
这样就可以不用分别训练两个网络
'''
count
=
0
#鉴别器D的训练,固定G的参数
epoch
=
100
gepoch
=
1
for
i
in
range
(epoch):
for
(img, label)
in
trainloader:
# num_img=img.size()[0]
img
=
Variable(img).cuda()
real_label
=
Variable(torch.ones(num_img)).cuda()
#真实label为1
fake_label
=
Variable(torch.zeros(num_img)).cuda()
#假的label为0
#compute loss of real_img
real_out
=
D(img)
#真实图片送入判别器D输出0~1
d_loss_real
=
criterion(real_out,real_label)
#得到loss
real_scores
=
real_out
#真实图片放入判别器输出越接近1越好
#compute loss of fake_img
z
=
Variable(torch.randn(num_img,z_dimension)).cuda()
#随机生成向量
fake_img
=
G(z)
#将向量放入生成网络G生成一张图片
fake_out
=
D(fake_img)
#判别器判断假的图片
d_loss_fake
=
criterion(fake_out,fake_label)
#假的图片的loss
fake_scores
=
fake_out
#假的图片放入判别器输出越接近0越好
#D bp and optimize
d_loss
=
d_loss_real
+
d_loss_fake
d_optimizer.zero_grad()
#判别器D的梯度归零
d_loss.backward()
#反向传播
d_optimizer.step()
#更新判别器D参数
#生成器G的训练compute loss of fake_img
for
j
in
range
(gepoch):
fake_label
=
Variable(torch.ones(num_img)).cuda()
# 真实label为1
z
=
Variable(torch.randn(num_img, z_dimension)).cuda()
# 随机生成向量
fake_img
=
G(z)
# 将向量放入生成网络G生成一张图片
output
=
D(fake_img)
# 经过判别器得到结果
g_loss
=
criterion(output, fake_label)
#得到假的图片与真实标签的loss
#bp and optimize
g_optimizer.zero_grad()
#生成器G的梯度归零
g_loss.backward()
#反向传播
g_optimizer.step()
#更新生成器G参数
# if ((i+1)%1000==0):
# print("[%d/%d] GLoss: %.5f" % (i + 1, gepoch, g_loss.data[0]))
print
(
'Epoch [{}/{}], d_loss: {:.6f}, g_loss: {:.6f} '
'D real: {:.6f}, D fake: {:.6f}'
.
format
(
i, epoch, d_loss.data[
0
], g_loss.data[
0
],
real_scores.data.mean(), fake_scores.data.mean()))
showimg(fake_img,count)
plt.show()
count
+
=
1
|
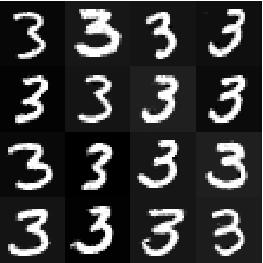
这里的gepoch设置为1,运行39次的结果是:
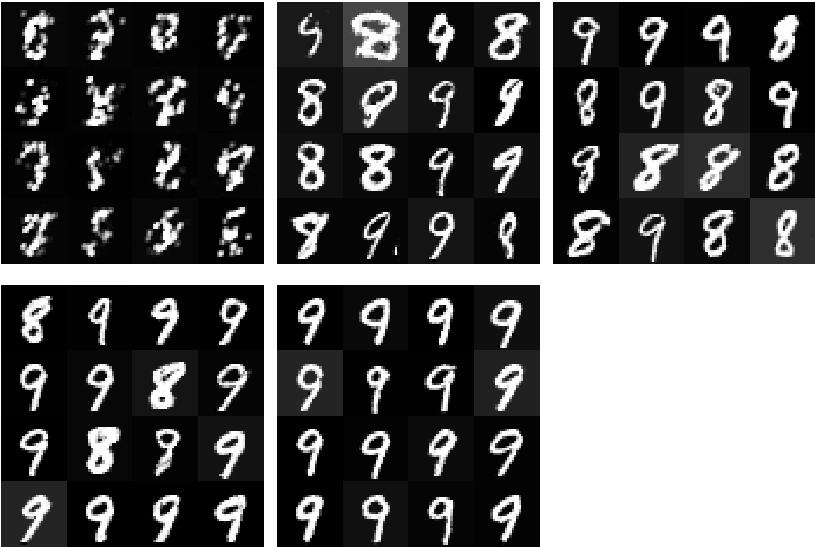
gepoch设置为2,运行0、25、50、75、100次的结果是:
gepoch设置为3,运行25、50、75次的结果是:

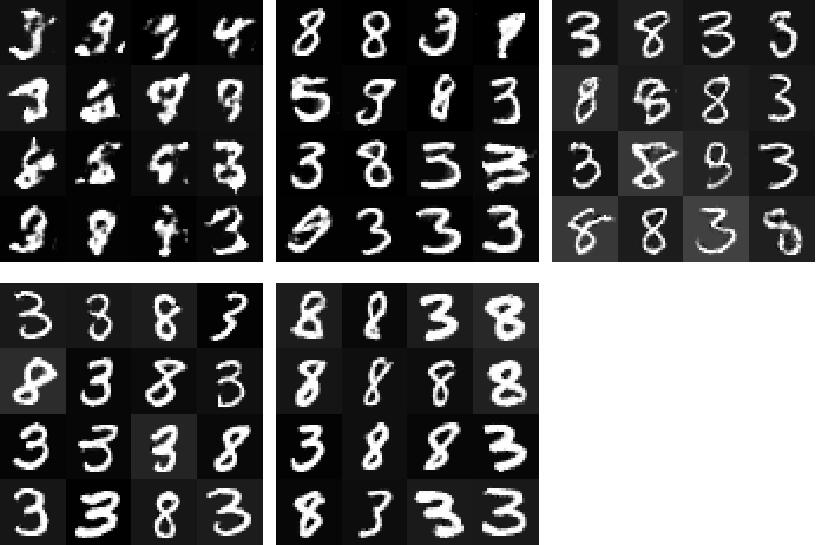
gepoch设置为4,运行0、10、20、30、35次的结果是:
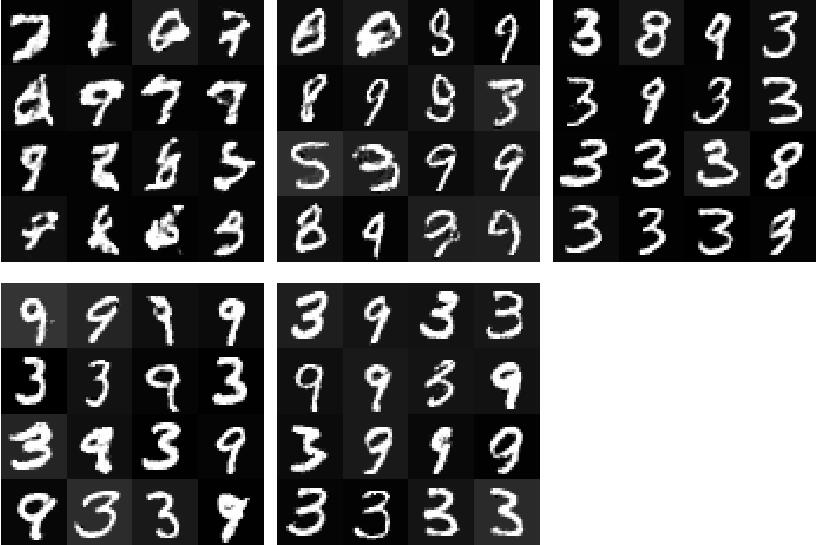
gepoch设置为5,运行0、10、20、25、29次的结果是:
gepoch设置为3,z_dimension设置为190,epoch运行0、10、15、20、25、35的结果是:
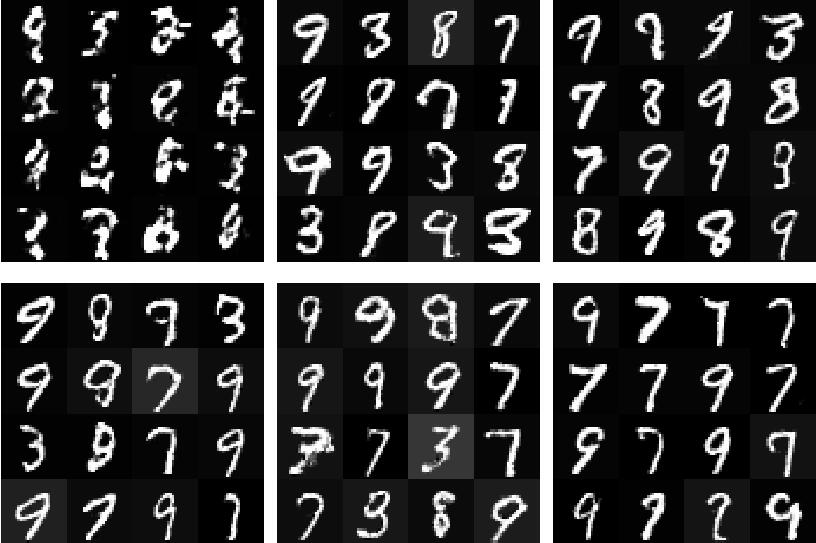
可以看到生成的数字基本没有太多的规律,可能最终都是同个数字,不能生成指定的数字,CGAN就很好的解决这个问题,可以生成指定的数字 Pytorch使用MNIST数据集实现CGAN和生成指定的数字方式 。
以上这篇Pytorch使用MNIST数据集实现基础GAN和DCGAN详解就是小编分享给大家的全部内容了,希望能给大家一个参考,也希望大家多多支持我.
原文链接:https://blog.csdn.net/shiheyingzhe/article/details/83098339 。
最后此篇关于Pytorch使用MNIST数据集实现基础GAN和DCGAN详解的文章就讲到这里了,如果你想了解更多关于Pytorch使用MNIST数据集实现基础GAN和DCGAN详解的内容请搜索CFSDN的文章或继续浏览相关文章,希望大家以后支持我的博客! 。
已关闭。此问题不符合Stack Overflow guidelines 。目前不接受答案。 这个问题似乎与 help center 中定义的范围内的编程无关。 . 已关闭 3 年前。 此帖子于去年编辑
据我所知,在使用 GPU 训练和验证模型时,GPU 内存主要用于加载数据,向前和向后。据我所知,我认为 GPU 内存使用应该相同 1) 训练前,2) 训练后,3) 验证前,4) 验证后。但在我的例子中
我正在尝试在 PyTorch 中将两个复数矩阵相乘,看起来 the torch.matmul functions is not added yet to PyTorch library for com
我正在尝试定义二分类问题的损失函数。但是,目标标签不是硬标签0,1,而是0~1之间的一个 float 。 Pytorch 中的 torch.nn.CrossEntropy 不支持软标签,所以我想自己写
我正在尝试让 PyTorch 与 DataLoader 一起工作,据说这是处理小批量的最简单方法,在某些情况下这是获得最佳性能所必需的。 DataLoader 需要一个数据集作为输入。 大多数关于 D
Pytorch Dataloader 的迭代顺序是否保证相同(在温和条件下)? 例如: dataloader = DataLoader(my_dataset, batch_size=4,
PyTorch 的负对数似然损失,nn.NLLLoss定义为: 因此,如果以单批处理的标准重量计算损失,则损失的公式始终为: -1 * (prediction of model for correct
在PyTorch中,new_ones()与ones()有什么区别。例如, x2.new_ones(3,2, dtype=torch.double) 与 torch.ones(3,2, dtype=to
假设我有一个矩阵 src带形状(5, 3)和一个 bool 矩阵 adj带形状(5, 5)如下, src = tensor([[ 0, 1, 2], [ 3, 4,
我想知道如果不在第 4 行中使用“for”循环,下面的代码是否有更有效的替代方案? import torch n, d = 37700, 7842 k = 4 sample = torch.cat([
我有三个简单的问题。 如果我的自定义损失函数不可微会发生什么? pytorch 会通过错误还是做其他事情? 如果我在我的自定义函数中声明了一个损失变量来表示模型的最终损失,我应该放 requires_
我想知道 PyTorch Parameter 和 Tensor 的区别? 现有answer适用于使用变量的旧 PyTorch? 最佳答案 这就是 Parameter 的全部想法。类(附加)在单个图像中
给定以下张量(这是网络的结果 [注意 grad_fn]): tensor([121., 241., 125., 1., 108., 238., 125., 121., 13., 117., 12
什么是__constants__在 pytorch class Linear(Module):定义于 https://pytorch.org/docs/stable/_modules/torch/nn
我在哪里可以找到pytorch函数conv2d的源代码? 它应该在 torch.nn.functional 中,但我只找到了 _add_docstr 行, 如果我搜索conv2d。我在这里看了: ht
如 documentation 中所述在 PyTorch 中,Conv2d 层使用默认膨胀为 1。这是否意味着如果我想创建一个简单的 conv2d 层,我必须编写 nn.conv2d(in_chann
我阅读了 Pytorch 的源代码,发现它没有实现 convolution_backward 很奇怪。函数,唯一的 convolution_backward_overrideable 函数是直接引发错
我对编码真的很陌生,现在我正在尝试将我的标签变成一种热门编码。我已经完成将 np.array 传输到张量,如下所示 tensor([4., 4., 4., 4., 4., 4., 4., 4., 4.
我正在尝试实现 text classification model使用CNN。据我所知,对于文本数据,我们应该使用一维卷积。我在 pytorch 中看到了一个使用 Conv2d 的示例,但我想知道如何
我有一个多标签分类问题,我正试图用 Pytorch 中的 CNN 解决这个问题。我有 80,000 个训练示例和 7900 个类;每个示例可以同时属于多个类,每个示例的平均类数为 130。 问题是我的

我是一名优秀的程序员,十分优秀!