- ubuntu12.04环境下使用kvm ioctl接口实现最简单的虚拟机
- Ubuntu 通过无线网络安装Ubuntu Server启动系统后连接无线网络的方法
- 在Ubuntu上搭建网桥的方法
- ubuntu 虚拟机上网方式及相关配置详解
CFSDN坚持开源创造价值,我们致力于搭建一个资源共享平台,让每一个IT人在这里找到属于你的精彩世界.
这篇CFSDN的博客文章Spring-AOP @AspectJ切点函数之@annotation()用法由作者收集整理,如果你对这篇文章有兴趣,记得点赞哟.
@annotation表示标注了某个注解的所有方法.
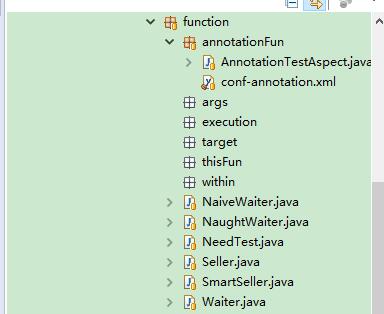
下面通过一个实例说明@annotation()的用法。 AnnotationTestAspect定义了一个后置切面增强,该增强将应用到标注了NeedTest的目标方法中.
代码已托管到Github—> https://github.com/yangshangwei/SpringMaster 。

首先我们先自定义一个注解@NeedTest.
如何自定义注解请参考Java-Java5.0注解解读 。
|
1
2
3
4
5
6
7
8
9
10
11
12
13
14
15
16
17
18
19
20
21
22
23
24
25
26
|
package
com.xgj.aop.spring.advisor.aspectJ.function;
import
java.lang.annotation.Documented;
import
java.lang.annotation.ElementType;
import
java.lang.annotation.Retention;
import
java.lang.annotation.RetentionPolicy;
import
java.lang.annotation.Target;
/**
*
*
* @ClassName: NeedTest
*
* @Description: 自定义注解@NeedTest
*
* @author: Mr.Yang
*
* @date: 2017年8月26日 下午11:19:12
*/
// 声明注解的保留期限
@Retention
(RetentionPolicy.RUNTIME)
// 声明可以使用该注解的目标类型
@Target
(ElementType.METHOD)
@Documented
public
@interface
NeedTest {
// 声明注解成员
boolean
value()
default
false
;
}
|
下面我们定义接口 Waiter 。
|
1
2
3
4
5
|
package
com.xgj.aop.spring.advisor.aspectJ.function;
public
interface
Waiter {
public
void
greetTo(String clientName);
public
void
serverTo(String clientName);
}
|
接口实现类 两个NaiveWaiter 和 NaughtWaiter 。
|
1
2
3
4
5
6
7
8
9
10
11
12
13
14
15
16
|
package
com.xgj.aop.spring.advisor.aspectJ.function;
public
class
NaiveWaiter
implements
Waiter {
@NeedTest
(
true
)
@Override
public
void
greetTo(String clientName) {
System.out.println(
"NaiveWaiter:greet to "
+ clientName);
}
@Override
public
void
serverTo(String clientName) {
System.out.println(
"NaiveWaiter:server to "
+ clientName);
}
public
void
smile(String clientName,
int
times) {
System.out.println(
"NaiveWaiter:smile to "
+ clientName +
" "
+ times
+
" times"
);
}
}
|
|
1
2
3
4
5
6
7
8
9
10
11
12
13
14
15
16
|
package
com.xgj.aop.spring.advisor.aspectJ.function;
public
class
NaughtWaiter
implements
Waiter {
@Override
public
void
greetTo(String clientName) {
System.out.println(
"NaughtWaiter:greet to "
+ clientName);
}
@NeedTest
(
true
)
@Override
public
void
serverTo(String clientName) {
System.out.println(
"NaughtWaiter:server to "
+ clientName);
}
public
void
joke(String clientName,
int
times) {
System.out.println(
"NaughtyWaiter:play "
+ times +
" jokes to "
+ clientName);
}
}
|
我们可以看到 NaiveWaiter#greetTo()方法标注了@NeedTest, NaughtWaiter#serverTo()也标注了@NeedTest,我们的目标就是将后置增强织入到这两个标注了@NeedTest的方法中.
接下来编写切面的横切逻辑 。
|
1
2
3
4
5
6
7
8
9
10
11
12
13
14
15
16
17
18
19
20
21
|
package
com.xgj.aop.spring.advisor.aspectJ.function.annotationFun;
import
org.aspectj.lang.annotation.AfterReturning;
import
org.aspectj.lang.annotation.Aspect;
/**
*
*
* @ClassName: AnnotationTestAspect
*
* @Description: 切面 、 后置增强 ,@annotation表示标注了某个注解的所有方法
*
* @author: Mr.Yang
*
* @date: 2017年8月26日 下午11:23:53
*/
@Aspect
public
class
AnnotationTestAspect {
@AfterReturning
(
"@annotation(com.xgj.aop.spring.advisor.aspectJ.function.NeedTest)"
)
public
void
needTest() {
System.out.println(
"needTest() executed,some logic is here"
);
}
}
|
接下来通过Spring自动应用切面,配置文件如下 。
|
1
2
3
4
5
6
7
8
9
10
11
12
13
14
15
16
17
18
19
|
<?
xml
version
=
"1.0"
encoding
=
"UTF-8"
?>
<
beans
xmlns
=
"http://www.springframework.org/schema/beans"
xmlns:aop
=
"http://www.springframework.org/schema/aop"
xmlns:xsi
=
"http://www.w3.org/2001/XMLSchema-instance"
xsi:schemaLocation="http://www.springframework.org/schema/beans
http://www.springframework.org/schema/beans/spring-beans.xsd
http://www.springframework.org/schema/aop
http://www.springframework.org/schema/aop/spring-aop.xsd">
<!-- 使用基于Schema的aop命名空间进行配置 -->
<!-- 基于@AspectJ切面的驱动器 -->
<
aop:aspectj-autoproxy
/>
<!-- 目标Bean -->
<
bean
id
=
"naiveWaiter"
class
=
"com.xgj.aop.spring.advisor.aspectJ.function.NaiveWaiter"
/>
<
bean
id
=
"naughtWaiter"
class
=
"com.xgj.aop.spring.advisor.aspectJ.function.NaughtWaiter"
/>
<!-- 使用了@AspectJ注解的切面类 -->
<
bean
class
=
"com.xgj.aop.spring.advisor.aspectJ.function.annotationFun.AnnotationTestAspect"
/>
</
beans
>
|
最后编写测试代码:
|
1
2
3
4
5
6
7
8
9
10
11
12
13
14
15
16
17
18
19
20
|
package
com.xgj.aop.spring.advisor.aspectJ.function.annotationFun;
import
org.junit.Test;
import
org.springframework.context.ApplicationContext;
import
org.springframework.context.support.ClassPathXmlApplicationContext;
import
com.xgj.aop.spring.advisor.aspectJ.function.Waiter;
public
class
AnnotationTestAspcetTest {
@Test
public
void
test() {
ApplicationContext ctx =
new
ClassPathXmlApplicationContext(
"com/xgj/aop/spring/advisor/aspectJ/function/annotationFun/conf-annotation.xml"
);
// 必须是接口类型,否则抛类型转换异常
Waiter waiter = (Waiter) ctx.getBean(
"naiveWaiter"
);
// 因为greetTo标注了@NeedTest,因此会被后置增强
waiter.greetTo(
"XiaoGongJiang"
);
waiter.serverTo(
"XiaoGongJiang"
);
Waiter naughtWaiter = (Waiter) ctx.getBean(
"naughtWaiter"
);
// serverTo标注了@NeedTest,因此会被后置增强
naughtWaiter.serverTo(
"XiaoGongJiang"
);
}
}
|
运行结果:
2017-08-27 01:24:22,551 INFO [main] (AbstractApplicationContext.java:583) - Refreshing org.springframework.context.support.ClassPathXmlApplicationContext@6ac604: startup date [Sun Aug 27 01:24:22 BOT 2017]; root of context hierarchy 2017-08-27 01:24:22,647 INFO [main] (XmlBeanDefinitionReader.java:317) - Loading XML bean definitions from class path resource [com/xgj/aop/spring/advisor/aspectJ/function/annotationFun/conf-annotation.xml] NaiveWaiter:greet to XiaoGongJiang needTest() executed,some logic is here NaiveWaiter:server to XiaoGongJiang NaughtWaiter:server to XiaoGongJiang needTest() executed,some logic is here 。
从输出结果中可以看出,切面被正确的织入到了标注有@NeedTest注解的方法中.
以上为个人经验,希望能给大家一个参考,也希望大家多多支持我.
原文链接:https://artisan.blog.csdn.net/article/details/77619875 。
最后此篇关于Spring-AOP @AspectJ切点函数之@annotation()用法的文章就讲到这里了,如果你想了解更多关于Spring-AOP @AspectJ切点函数之@annotation()用法的内容请搜索CFSDN的文章或继续浏览相关文章,希望大家以后支持我的博客! 。
关闭。这个问题不符合Stack Overflow guidelines .它目前不接受答案。 想改进这个问题?将问题更新为 on-topic对于堆栈溢出。 6年前关闭。 Improve this qu
我有实体: @Entity @Table(name = "CARDS") public class Card { @ManyToOne @JoinColumn(name = "PERSON_I
我正在尝试计算二维多边形的表面法线。我正在使用 OpenGL wiki 中的 Newell 方法来计算表面法线。 https://www.opengl.org/wiki/Calculating_a_S
关闭。这个问题不符合Stack Overflow guidelines .它目前不接受答案。 这个问题似乎与 help center 中定义的范围内的编程无关。 . 关闭 7 年前。 Improve
关闭。这个问题是off-topic .它目前不接受答案。 想改进这个问题吗? Update the question所以它是on-topic用于堆栈溢出。 关闭 9 年前。 Improve this
我这里有以下 XML: Visa, Mastercard, , , , 0, Discover, American Express siteonly, Buyer Pay
即将发生的 Google 政策变更迫使我们实现一个对话框,以通知欧盟用户有关 Cookie/设备标识符用于广告和分析的情况。我只想向欧盟用户显示此对话框。我不想使用额外的权限(例如 android.p
本文分享自华为云社区《华为大咖说 | 企业应用AI大模型的“道、法、术” ——道:认知篇》,作者:华为云PaaS服务小智。 本期核心观点 上车:AGI是未来5~10年内,每个人都无法回避的技
我有一个与酒精相关的网站,需要先验证年龄,然后才能让他们进入该网站。我使用 HttpModule 来执行此操作,该模块检查 cookie,如果未设置,我会将它们重定向到验证页面。我验证他们的年龄并存储
在欧盟,我们有一项法律,要求网页请求存储 cookie 的许可。我们大多数人都了解 cookie 并同意它们,但仍然被迫在任何地方明确接受它们。所以我计划编写这个附加组件(ff & chrome),它
以下在 C 和/或 C++ 中是否合法? void fn(); inline void fn() { /*Do something here*/ } 让我担心的是,第一个声明看起来暗示函数将被定义

我是一名优秀的程序员,十分优秀!