作者热门文章
- ubuntu12.04环境下使用kvm ioctl接口实现最简单的虚拟机
- Ubuntu 通过无线网络安装Ubuntu Server启动系统后连接无线网络的方法
- 在Ubuntu上搭建网桥的方法
- ubuntu 虚拟机上网方式及相关配置详解
CFSDN坚持开源创造价值,我们致力于搭建一个资源共享平台,让每一个IT人在这里找到属于你的精彩世界.
这篇CFSDN的博客文章Java小白第一次就能看懂的网络编程由作者收集整理,如果你对这篇文章有兴趣,记得点赞哟.
。
。
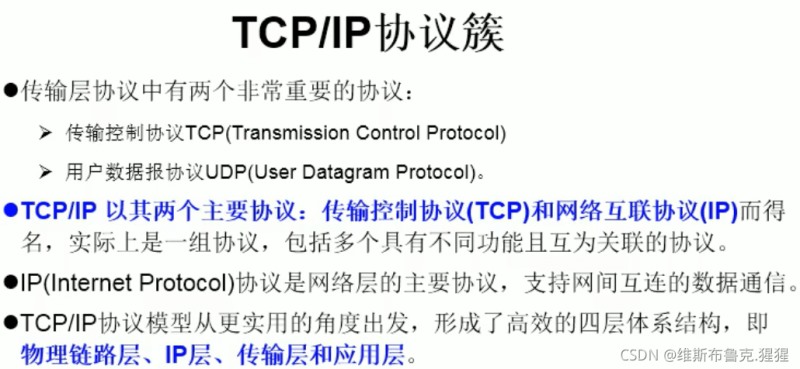
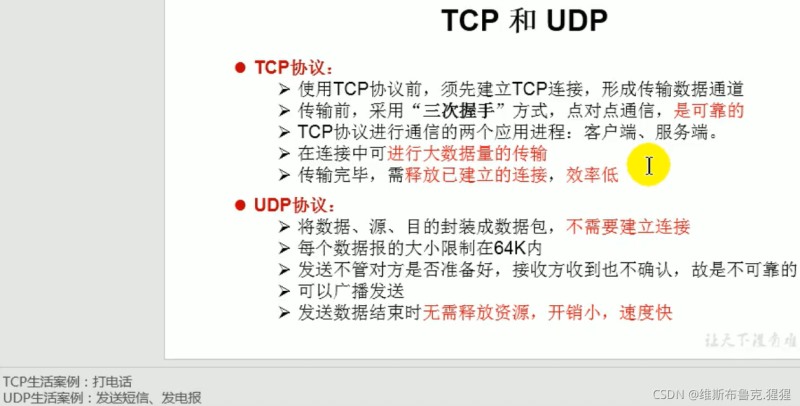
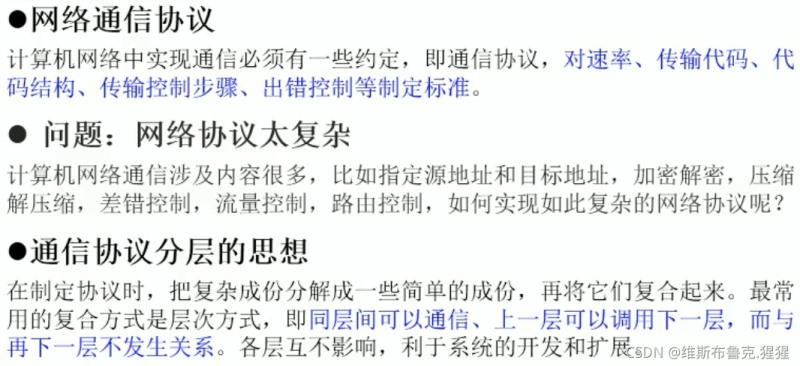
实现TCP的网络编程 例子1:客户端发送信息给服务端,服务端将数据显示在控制台上public class TCPTest1 { //客户端 @Test public void client() { Socket socket = null; OutputStream os = null; try { //1.创建Socket对象,指明服务器端的ip和端口号 InetAddress inet = InetAddress.getByName("127.0.0.1"); socket = new Socket(inet, 8899); //2.获取一个输出流,用于输出数据 os = socket.getOutputStream(); //3.写出数据的操作 os.write("你好,我是客户端mm".getBytes()); } catch (IOException e) { e.printStackTrace(); } finally { //4.资源的关闭 if(os != null){ try { os.close(); } catch (IOException e) { e.printStackTrace(); } } if(socket != null){ try { socket.close(); } catch (IOException e) { e.printStackTrace(); } } } } //服务端 @Test public void server(){ ServerSocket ss = null; Socket socket = null; InputStream is = null; ByteArrayOutputStream baos = null; try { //1.创建服务器的ServerSocket,指明自己的端口号 ss = new ServerSocket(8899); //2.调用accept()表示接收来自于客户端的socket socket = ss.accept(); //3.获取输入流 is = socket.getInputStream(); //不建议这样写,可能会有乱码// byte[] buffer = new byte[1024];// int len;// while((len = is.read(buffer)) != -1){// String str = new String(buffer,0,len);// System.out.println(str);// } //4.读取输入流中的数据 baos = new ByteArrayOutputStream(); byte[] buffer = new byte[5]; int len; while((len = is.read(buffer)) != -1){ baos.write(buffer,0,len); } System.out.println(baos.toString()); } catch (IOException e) { e.printStackTrace(); } finally { //5.关闭资源 if(baos != null){ try { baos.close(); } catch (IOException e) { e.printStackTrace(); } } if(is != null){ try { is.close(); } catch (IOException e) { e.printStackTrace(); } } if(socket != null){ try { socket.close(); } catch (IOException e) { e.printStackTrace(); } } if(ss != null){ try { ss.close(); } catch (IOException e) { e.printStackTrace(); } } } }}
实现TCP的网络编程 例题2:客户端发送文件给服务端,服务端将文件保存在本地。public class TCPTest2 { //这里异常处理的方式应该使用try-catch-finally @Test public void client() throws IOException { Socket socket = new Socket(InetAddress.getByName("127.0.0.1"), 9090); OutputStream os = socket.getOutputStream(); FileInputStream fis = new FileInputStream(new File("beauty.jpg")); byte[] buffer = new byte[1024]; int len; while((len = fis.read(buffer)) != -1){ os.write(buffer,0,len); } fis.close(); os.close(); socket.close(); } //这里异常处理的方式应该使用try-catch-finally @Test public void server() throws IOException { ServerSocket ss = new ServerSocket(9090); Socket socket = ss.accept(); InputStream is = socket.getInputStream(); FileOutputStream fos = new FileOutputStream(new File("beauty1.jpg")); byte[] buffer = new byte[1024]; int len; while((len = is.read(buffer)) != -1){ fos.write(buffer,0,len); } fos.close(); is.close(); socket.close(); ss.close(); }}
实现TCP的网络编程 例题3:从客户端发送文件给服务端,服务端保存到本地,并返回"发送成功"给客户端。并关闭相应的连接 public class TCPTest3 { @Test public void client() throws IOException { Socket socket = new Socket(InetAddress.getByName("127.0.0.1"), 9090); OutputStream os = socket.getOutputStream(); FileInputStream fis = new FileInputStream(new File("beauty.jpg")); byte[] buffer = new byte[1024]; int len; while((len = fis.read(buffer)) != -1){ os.write(buffer,0,len); } //服务区端给予客户端反馈 OutputStream os1 = socket.getOutputStream(); os.write("你好,美女,照片我以收到,非常漂亮!".getBytes()); fis.close(); os.close(); socket.close(); os1.close(); } //这里异常处理的方式应该使用try-catch-finally @Test public void server() throws IOException { ServerSocket ss = new ServerSocket(9090); Socket socket = ss.accept(); InputStream is = socket.getInputStream(); FileOutputStream fos = new FileOutputStream(new File("beauty2.jpg")); byte[] buffer = new byte[1024]; int len; while((len = is.read(buffer)) != -1){ fos.write(buffer,0,len); } //接受来自于服务器端的数据,并显示到控制台上 InputStream is1 = socket.getInputStream(); ByteArrayOutputStream baos = new ByteArrayOutputStream(); byte[] bufferr = new byte[20]; int len1; while((len1 = is1.read(buffer)) != -1){ baos.write(buffer,0,len1); } System.out.println(baos.toString()); fos.close(); is.close(); socket.close(); ss.close(); baos.close(); }}
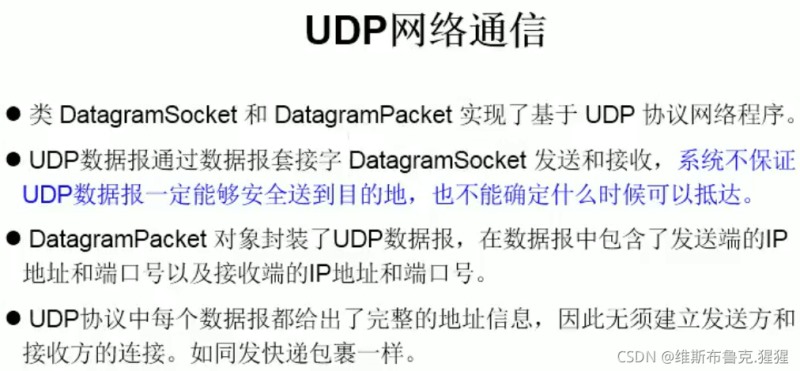
UDP协议的网络编程public class UDPTest { @Test public void sender() throws IOException { DatagramSocket socket = new DatagramSocket(); String str = "我是UDP方式发送的导弹"; byte[] data = str.getBytes(); InetAddress inet = InetAddress.getLocalHost(); DatagramPacket packet = new DatagramPacket(data,0,data.length,inet,9090); socket.send(packet); socket.close(); } @Test public void receiver() throws IOException { DatagramSocket socket = new DatagramSocket(9090); byte[] buffer = new byte[100]; DatagramPacket packet = new DatagramPacket(buffer, 0, buffer.length); socket.receive(packet); System.out.println(new String(packet.getData(),0,packet.getLength())); }


。
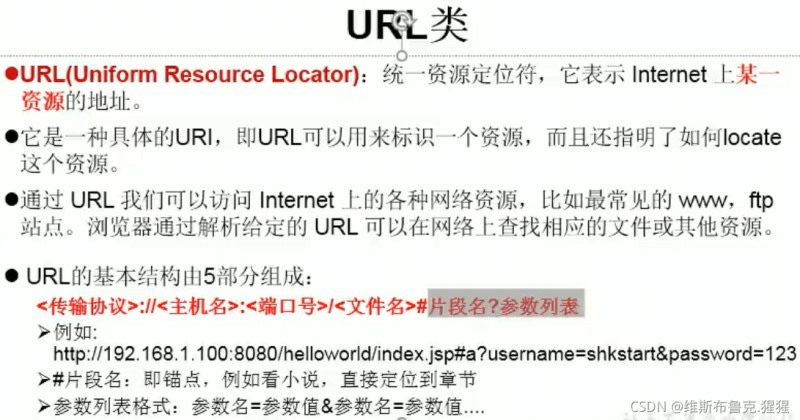
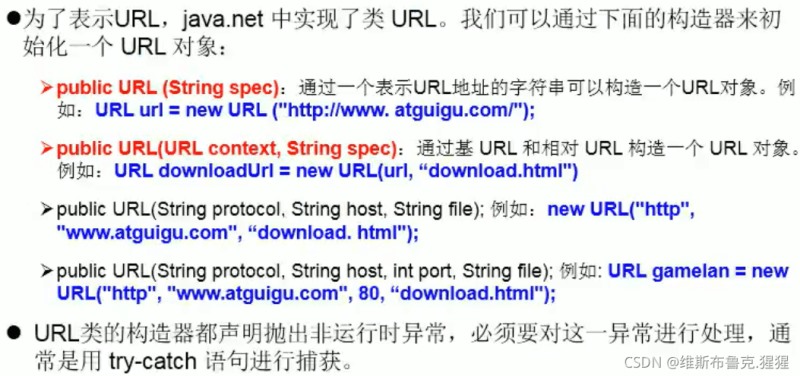
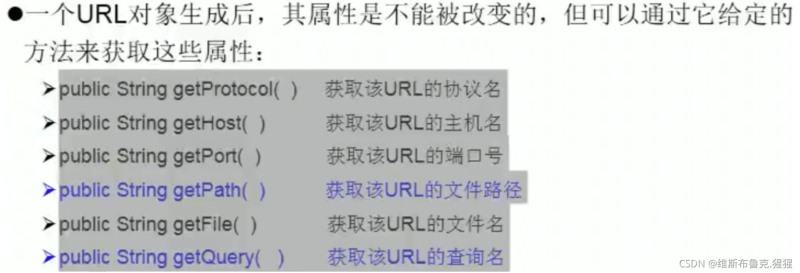
URL网络编程 1.URL:统一资源定位符,对应着互联网的某一资源地址 2.格式: http://localhost:8080/examples/beauty.jpg?username=Tom 协议 主机名 端口号 资源地址 参数列表 public class URLTest { public static void main(String[] args) { try { URL url = new URL("http://localhost:8080/examples/beauty.jpg?username=Tom");// public String getProtocol() 获取该URL的协议名 System.out.println(url.getProtocol());// http// public String getHost() 获取该URL的主机名 System.out.println(url.getHost());//localhost// public String getPort() 获取该URL的端口号 System.out.println(url.getPort());// 8080// public String getPath() 获取该URL的文件路径 System.out.println(url.getPath());//examples/beauty.jpg// public String getFile() 获取该URL的文件名 System.out.println(url.getFile());//examples/beauty.jpg?username=Tom// public String getQuery() 获取该URL的查询名 System.out.println(url.getQuery());//username=Tom } catch (MalformedURLException e) { e.printStackTrace(); } }}
到此这篇关于Java小白第一次就能看懂的网络编程的文章就介绍到这了,更多相关Java网络编程内容请搜索我以前的文章或继续浏览下面的相关文章希望大家以后多多支持我! 。
原文链接:https://blog.csdn.net/weixin_49329785/article/details/119979545?utm_medium=distribute.pc_category.none-task-blog-hot-3.nonecase&depth_1-utm_source=distribute.pc_category.none-task-blog-hot-3.nonecase 。
最后此篇关于Java小白第一次就能看懂的网络编程的文章就讲到这里了,如果你想了解更多关于Java小白第一次就能看懂的网络编程的内容请搜索CFSDN的文章或继续浏览相关文章,希望大家以后支持我的博客! 。

我是一名优秀的程序员,十分优秀!