- ubuntu12.04环境下使用kvm ioctl接口实现最简单的虚拟机
- Ubuntu 通过无线网络安装Ubuntu Server启动系统后连接无线网络的方法
- 在Ubuntu上搭建网桥的方法
- ubuntu 虚拟机上网方式及相关配置详解
CFSDN坚持开源创造价值,我们致力于搭建一个资源共享平台,让每一个IT人在这里找到属于你的精彩世界.
这篇CFSDN的博客文章C++实现Huffman的编解码由作者收集整理,如果你对这篇文章有兴趣,记得点赞哟.
Huffman编码主要是通过统计各元素出现的频率,进而生成编码最终达到压缩的目的.
这里是Huffman树中节点的结构.
|
1
2
3
4
5
6
7
8
|
typedef
struct
Tree
{
int
freq;
//频率
int
key;
//键值
struct
Tree *left, *right;
Tree(
int
fr=0,
int
k=0,Tree *l=nullptr, Tree *r=nullptr):
freq(fr),key(k),left(l),right(r){};
}Tree,*pTree;
|
首先用一个名为freq的hashtable来记录各个元素的频率:
|
1
2
3
4
5
6
7
8
9
10
|
void
read(){
int
a;
std::ios::sync_with_stdio(
false
);
while
(cin>>a){
if
(freq.find(a)==freq.end()) {freq[a]=1;}
else
{freq[a]++;}
}
}
|
Huffman树的构建过程如下代码所示:
|
1
2
3
4
5
6
7
8
9
10
11
12
13
14
15
16
17
18
19
20
21
22
23
24
25
26
27
28
29
30
31
32
33
34
35
36
37
38
39
40
41
42
43
|
void
huffman()
{
int
i;
string c;
int
fr;
auto it = freq.begin();
while
(it!=freq.end()){
Tree *pt=
new
Tree;
pt->key = it->first;
pt->freq = it->second;
it++;
th.Insert(pt);
//此处的th为一种优先队列
}
while
(
true
)
//构建哈夫曼树
{
Tree *proot =
new
Tree;
pTree pl,pr;
pl = th.findMin();
th.Delete(0);
if
(th.isEmpty()){
th.Insert(pl);
break
;
}
pr = th.findMin();
th.Delete(0);
//合并节点
proot->freq = pl->freq + pr->freq;
std::ios::sync_with_stdio(
false
);
proot->left = pl;
proot->right = pr;
th.Insert(proot);
//合并后再插入
}
string s;
print_Code(th.findMin(), s);
del(th.findMin());
}
|
其中print_Code和del函数如下:
|
1
2
3
4
5
6
7
8
9
10
11
12
13
14
15
16
17
18
19
20
21
22
23
24
25
26
27
28
29
30
31
32
33
|
void
print_Code(Tree *proot, string st)
//从根节点开始打印,左0右1
{
if
(proot == NULL)
return
;
if
(proot->left)
{
st +=
'0'
;
}
print_Code(proot->left, st);
std::ios::sync_with_stdio(
false
);
if
(!proot->left && !proot->right)
{
cout<<proot->key<<
" "
;
for
(
size_t
i=0; i<st.length(); ++i){
cout<<st[i];ml+=st[i];
}
cout<<endl;encoded[proot->key]=ml;ml=
""
;
}
st.pop_back();
if
(proot->right)
st+=
'1'
;
print_Code(proot->right, st);
}
void
del(Tree *proot)
{
if
(proot == nullptr)
return
;
del(proot->left);
del(proot->right);
delete
proot;
}
|
至此就完成了Huffman的编码.
当然,由于huffman的编码都是0或1,因此需要进行位的表示才能完成压缩。注意,位需要以8个为一组进行写入:
|
1
2
3
4
5
6
7
8
9
10
11
12
13
14
15
16
17
18
19
20
21
22
23
24
25
26
27
|
while
(in>>a){
int
x=
atoi
(a.c_str());
auto m=encoded.find(x);
//encoded是另外一个哈希表用于记录元素及它的编码
if
(m==encoded.end())
continue
;
else
{
string t=m->second;
ss+=t;
}
}
unsigned
char
buf = 0;
int
count = 0;
int
i = 0;
while
(ss[i] !=
'\0'
)
//位写入,8个为一组
{
buf = buf | ((ss[i++]-
'0'
) << (7 - count));
count++;
if
(count == 8)
{
count = 0;
fout << buf;
buf = 0;
}
}
if
(count != 0)
fout << buf;
|
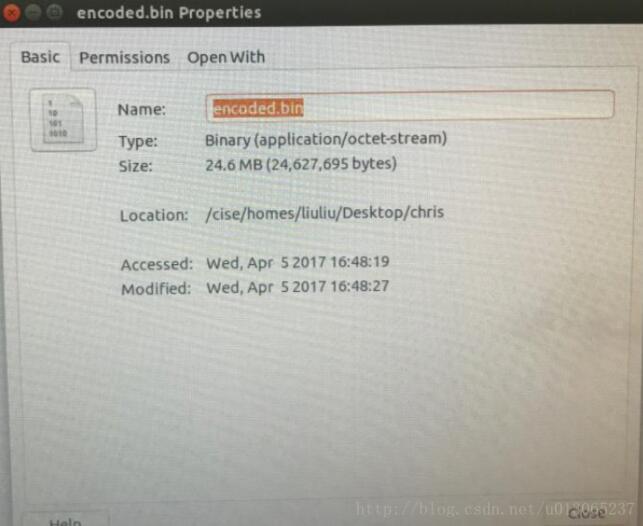
至此就完成了Huffman的编码以及压缩,效果十分可观: 当对69.6M的txt文件(其中含有大约10000000个数据)进行压缩时,产生的encoded.bin文件仅为24.6MB:Ubuntu测试环境:

下面进行Huffman解码的解说:
Huffman解码首先是根据编码表进行huffman树的重建:
|
1
2
3
4
5
6
7
8
9
10
11
12
13
14
15
16
17
18
19
20
21
22
|
void
decode(){
auto it=decoded.begin();
Tree *p=proot;
while
(it!=decoded.end()){
string s=it->first;
int
t=it->second;
int
i=0;
while
(i<s.length()){
if
(s[i]==
'0'
) {
if
(proot->left==nullptr) proot->left=
new
Tree(5);
proot=proot->left;
}
else
{
if
(proot->right==nullptr) proot->right=
new
Tree(5);
proot=proot->right;
}
i++;
}
proot->data=t;
proot=p;
it++;
}
}
|
然后读取bin文件的一系列位:
|
1
2
3
4
5
6
7
|
while
(f.get(c)){
stringstream a;
for
(
int
i = 7; i > 0; i--)
a<<((c >> i) & 1);
a<<(c&1);
m+=a.str();
//将位转为字符串
}
|
然后用Huffman树根据左0右1进行查找并输出:
|
1
2
3
4
5
6
7
8
9
10
|
int
i=0;Tree *p=proot;
while
(i<m.length()){
if
(m[i]==
'0'
&&proot->left!=nullptr)
{proot=proot->left;i++;}
else
if
(m[i]==
'1'
&&proot->right!=nullptr)
{proot=proot->right;i++;}
else
{cout<<proot->data<<endl;proot=p;}
}
|
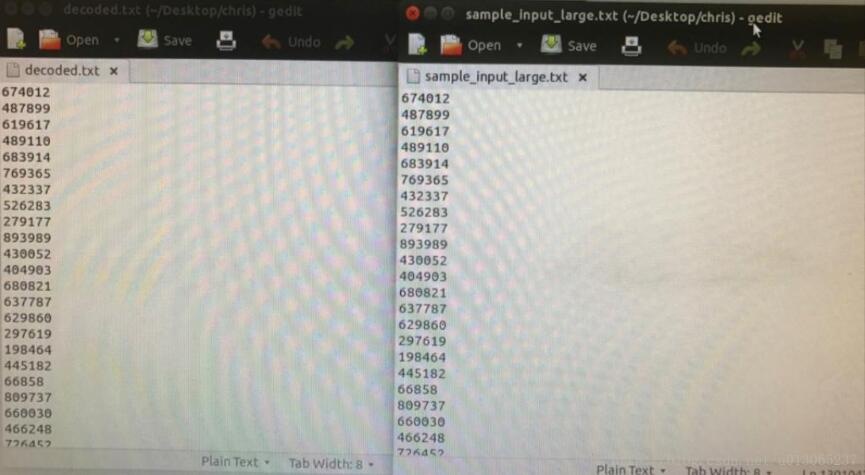
至此就完成了Huffman树的解码:

总的来说,Huffman对于大数据的压缩效果是很好的,运行时间也很快,大概需要20s就可以完成对1000000个数据的编码压缩.
难点在于位的写入与读取,花了相当多的精力进行操作.
以上就是本文的全部内容,希望对大家的学习有所帮助,也希望大家多多支持我.
原文链接:https://blog.csdn.net/u013065237/article/details/70669860 。
最后此篇关于C++实现Huffman的编解码的文章就讲到这里了,如果你想了解更多关于C++实现Huffman的编解码的内容请搜索CFSDN的文章或继续浏览相关文章,希望大家以后支持我的博客! 。

我是一名优秀的程序员,十分优秀!