- ubuntu12.04环境下使用kvm ioctl接口实现最简单的虚拟机
- Ubuntu 通过无线网络安装Ubuntu Server启动系统后连接无线网络的方法
- 在Ubuntu上搭建网桥的方法
- ubuntu 虚拟机上网方式及相关配置详解
CFSDN坚持开源创造价值,我们致力于搭建一个资源共享平台,让每一个IT人在这里找到属于你的精彩世界.
这篇CFSDN的博客文章iOS SwiftUI 颜色渐变填充效果的实现由作者收集整理,如果你对这篇文章有兴趣,记得点赞哟.
swiftui 为我们提供了各种梯度选项,所有这些选项都可以通过多种方式使用.
gradient 渐变器 。
a color gradient represented as an array of color stops, each having a parametric location value. 。
gradient是一组颜色的合集,每个颜色都忽略位置参数 。
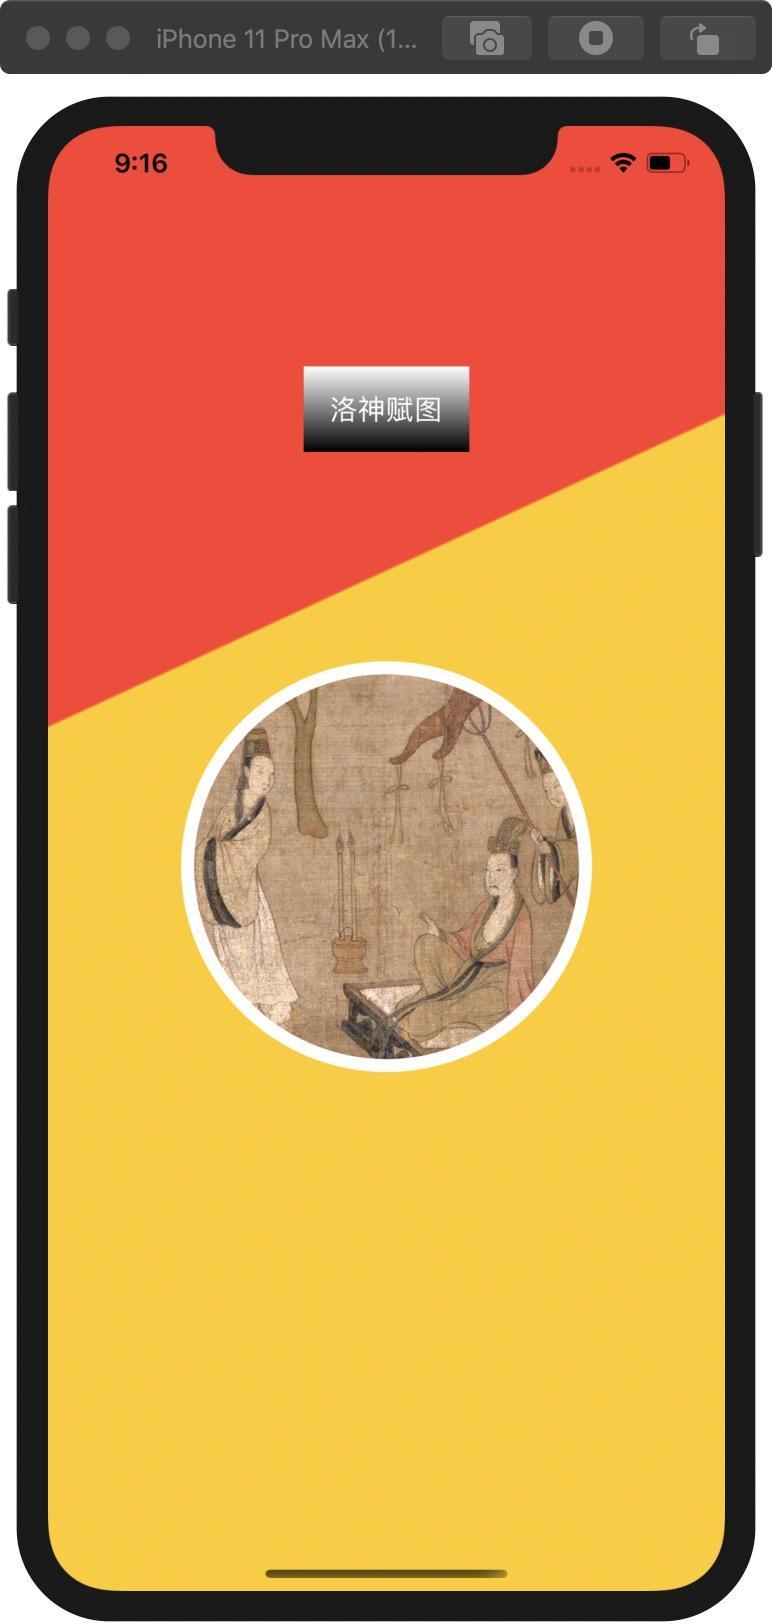
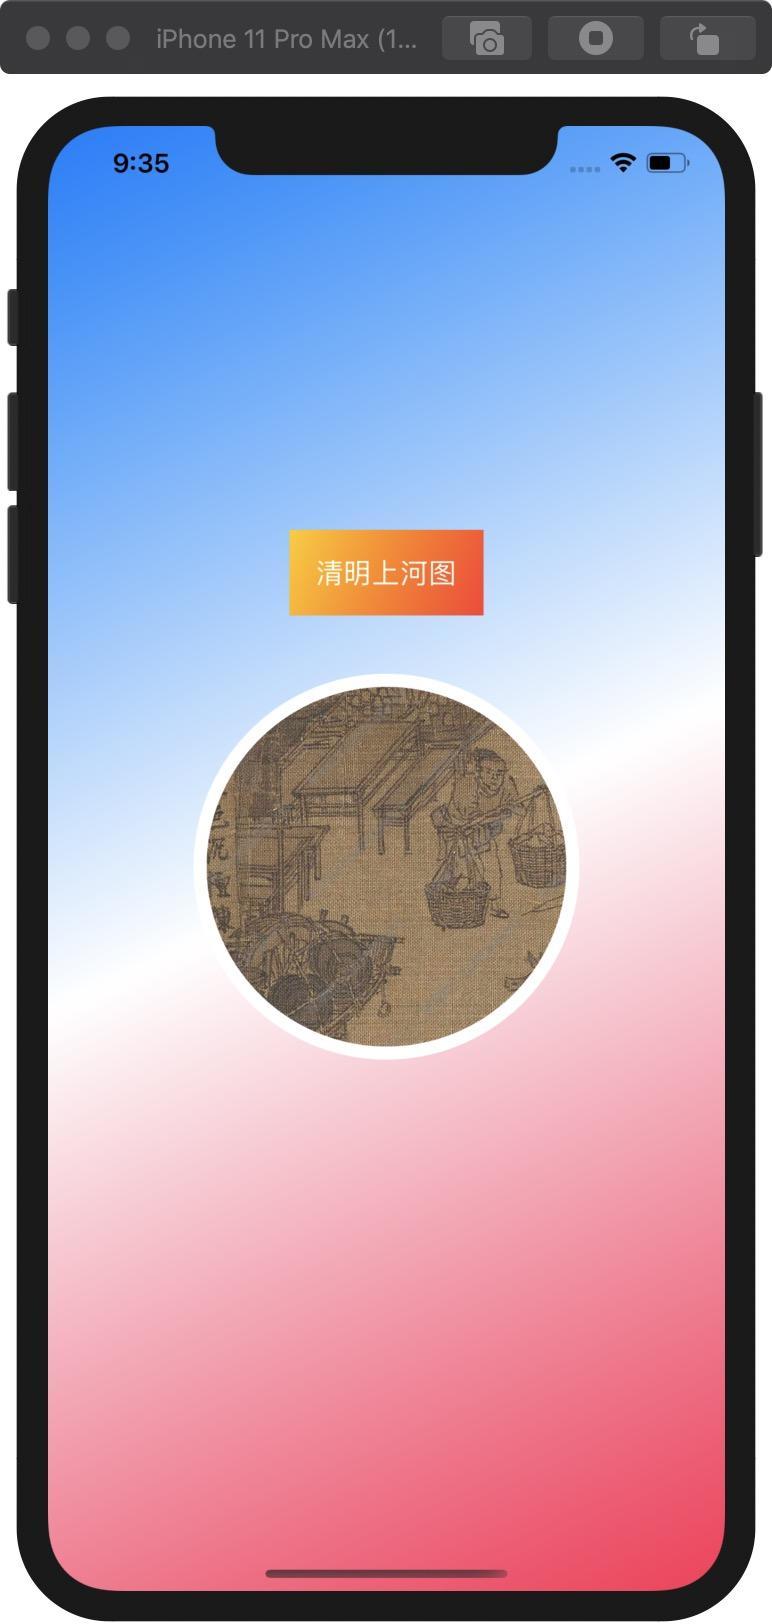
lineargradient 线性渐变器 。
线性渐变器拥有沿轴进行渐变函数,我们可以自定义设置颜色空间、起点和终点.
下面我们看看lineargradient效果 。

|
1
2
3
4
5
6
7
8
9
10
11
12
13
14
15
16
17
18
19
20
21
22
23
24
25
26
27
28
29
30
31
32
33
34
35
36
37
38
|
import swiftui
struct
lineview: view {
var gradient: gradient {
let stops: [gradient.stop] = [
.init(color: .red, location: 0.5),
.init(color: .yellow, location: 0.5)
]
return
gradient(stops: stops)
}
var body: some view {
zstack {
lineargradient(gradient: gradient,
startpoint: .top,
endpoint: .trailing)
.edgesignoringsafearea(.all)
image(
"1"
)
.resizable()
.aspectratio(contentmode: .fit)
.clipshape(circle())
.overlay(circle()
.stroke(linewidth: 8)
.foregroundcolor(.white))
.frame(width: 250)
text(
"洛神赋图"
)
.padding()
.foregroundcolor(.white)
.cornerradius(8)
.background(lineargradient(gradient: gradient(colors: [.white, .black]), startpoint: .top, endpoint: .bottom))
.offset(y:-280)
}
}
}
|

|
1
2
3
4
5
6
7
8
9
10
11
12
13
14
15
16
17
18
19
20
21
22
23
24
25
26
27
28
29
30
31
32
33
34
|
import swiftui
struct
linegradient3color: view {
var body: some view {
zstack {
lineargradient(gradient:
gradient(
colors: [.blue, .white, .pink]),
startpoint: .topleading,
endpoint: .bottomtrailing)
.edgesignoringsafearea(.all)
image(
"2"
)
.resizable()
.aspectratio(contentmode: .fit)
.clipshape(circle())
.overlay(circle()
.stroke(linewidth: 8)
.foregroundcolor(.white))
.frame(width: 250)
text(
"清明上河图"
)
.padding()
.foregroundcolor(.white)
.cornerradius(8)
.background(lineargradient(gradient: gradient(
colors: [.yellow, .red]),
startpoint: .topleading,
endpoint: .bottomtrailing))
.offset(y:-180)
}
}
}
|
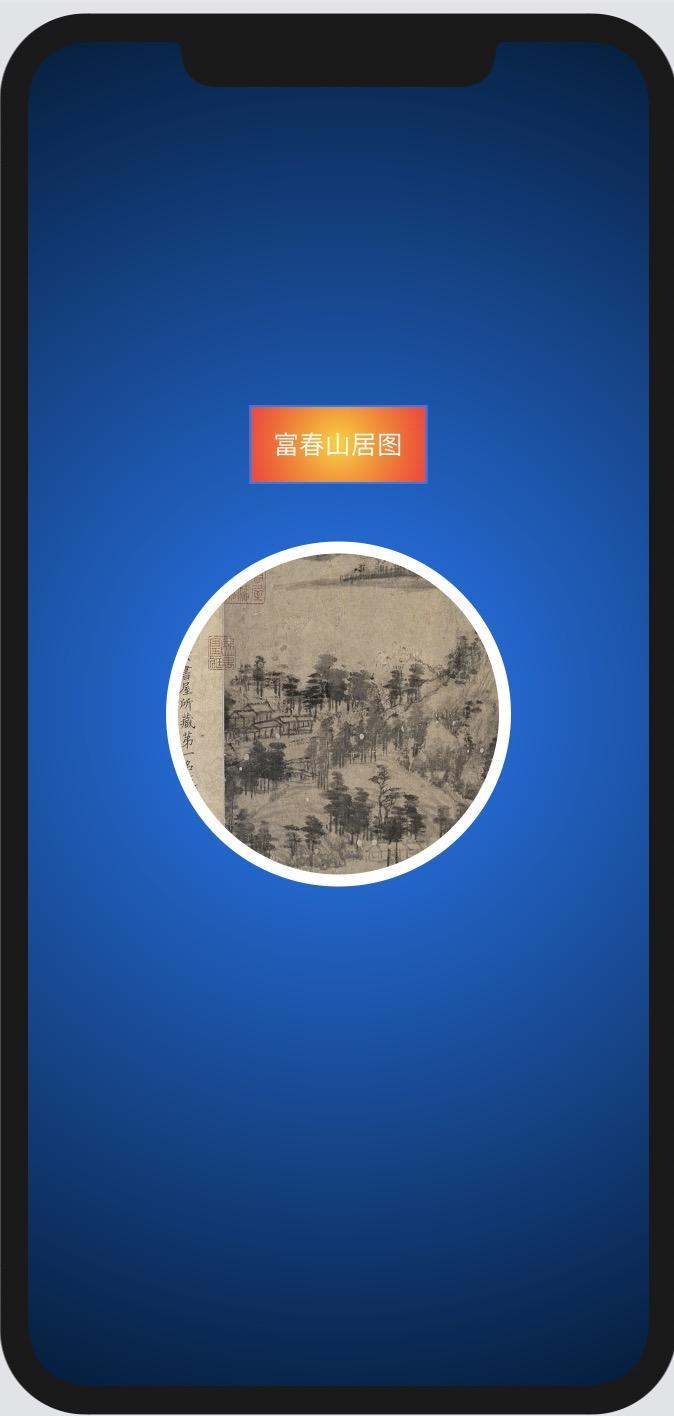
radial gradient 径向渐变 。
在径向渐变中,我们必须指定起始半径点,端半径点与中心点,从径向渐变开变. 。

|
1
2
3
4
5
6
7
8
9
10
11
12
13
14
15
16
17
18
19
20
21
22
23
24
25
26
27
28
29
30
31
32
33
34
35
|
import swiftui
struct
radialview: view {
var body: some view {
zstack {
radialgradient(gradient: gradient(
colors: [.blue, .black]),
center: .center,
startradius: 2,
endradius: 650)
.edgesignoringsafearea(.all)
image(
"3"
)
.resizable()
.aspectratio(contentmode: .fit)
.clipshape(circle())
.overlay(circle()
.stroke(linewidth: 8)
.foregroundcolor(.white))
.frame(width: 250)
text(
"富春山居图"
)
.padding()
.foregroundcolor(.white)
.cornerradius(8)
.background(
radialgradient(gradient: gradient(
colors: [.yellow, .red]),
center: .center,
startradius: 2,
endradius: 60))
.offset(y:-180)
}
}
}
|
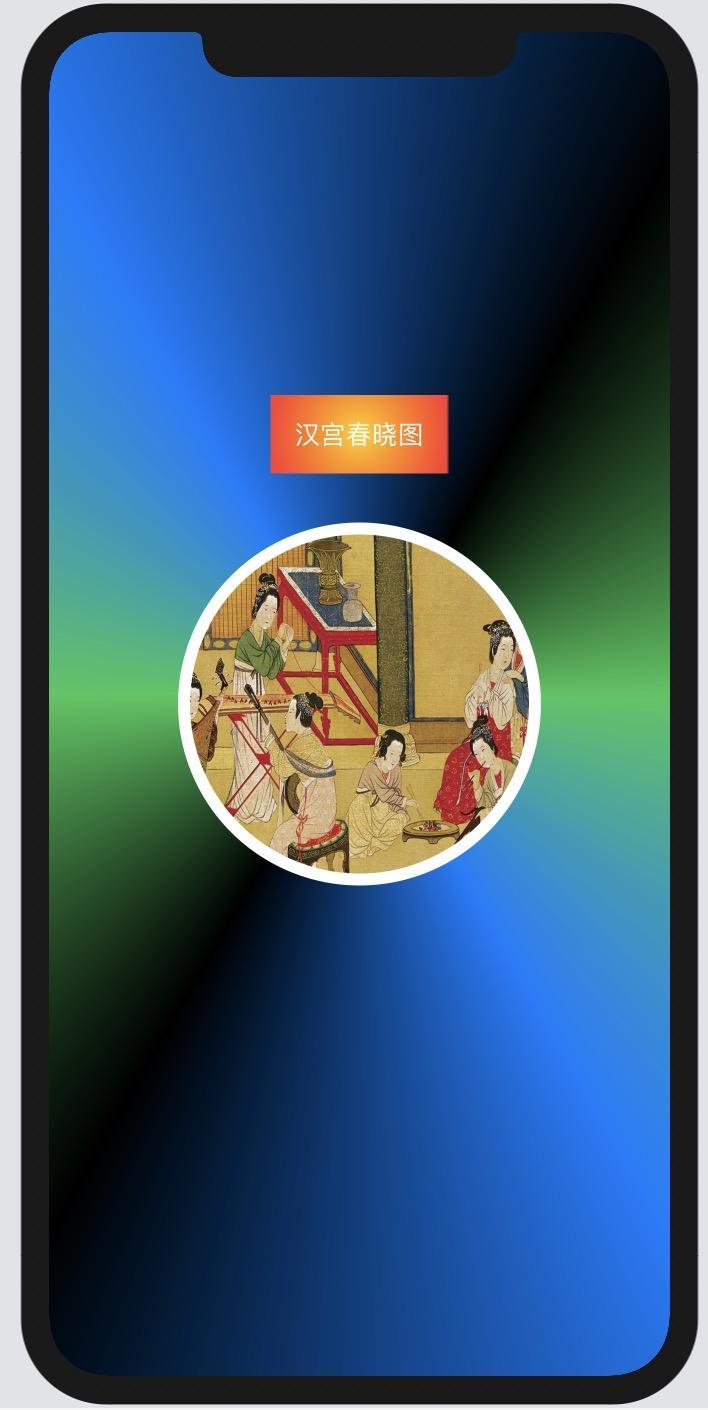
angular gradient 。
在角渐变中,我们只需要通过中心点.

|
1
2
3
4
5
6
7
8
9
10
11
12
13
14
15
16
17
18
19
20
21
22
23
24
25
26
27
28
29
30
31
32
|
import swiftui
struct
angularview: view {
var body: some view {
zstack {
angulargradient(gradient: gradient(
colors: [.green, .blue, .black, .green, .blue, .black, .green]),
center: .center)
.edgesignoringsafearea(.all)
image(
"4"
)
.resizable()
.aspectratio(contentmode: .fit)
.clipshape(circle())
.overlay(circle()
.stroke(linewidth: 8)
.foregroundcolor(.white))
.frame(width: 250)
text(
"汉宫春晓图"
)
.padding()
.foregroundcolor(.white)
.cornerradius(8)
.background(
radialgradient(gradient: gradient(
colors: [.yellow, .red]),
center: .center,
startradius: 2,
endradius: 60))
.offset(y:-180)
}
}
|
以上就是本文的全部内容,希望对大家的学习有所帮助,也希望大家多多支持我.
原文链接:https://segmentfault.com/a/1190000021780657 。
最后此篇关于iOS SwiftUI 颜色渐变填充效果的实现的文章就讲到这里了,如果你想了解更多关于iOS SwiftUI 颜色渐变填充效果的实现的内容请搜索CFSDN的文章或继续浏览相关文章,希望大家以后支持我的博客! 。
我可以使用 javascript 和其他所有东西,但在重新发明轮子之前,我想知道是否已经有一个类似的 jquery 插件,因为我想使用那个框架而不是 mootools。 我没有钱的问题,特别是 5 欧
我正在 React 应用程序中处理动画。我需要动画在悬停 后开始工作。我尝试了 :hover:after css 但不起作用。将鼠标悬停在图像上后动画可以工作,但我需要在悬停后开始。将鼠标悬停在图像上
我正在使用 jQuery 在按钮单击时实现 slider 效果。我的代码是: $(document).ready(function() { $("#mybutton").click(functio
我需要一个div标签在屏幕右侧滑出,如何使用jQuery获得这种效果?我一直在看这里:http://api.jquery.com/category/effects/sliding/而且这似乎不是我要找
我正在使用此代码实现页面 curl 效果......它在模拟器和设备中工作正常......但它不是(setType:@“pageCurl”)苹果记录的api,这导致它被iPhone拒绝App Stor
我见过各种关于 WPF 效果的引用,但它们似乎是针对位图的,而不是针对文本的。是否可以将除模糊或投影以外的效果应用于XAML中的TextBlock对象? 我想要做的示例可能是轮廓笔划,或斜角/浮雕效果
我见过各种关于 WPF 效果的引用,但它们似乎是针对位图的,而不是针对文本的。是否可以将除模糊或投影以外的效果应用于XAML中的TextBlock对象? 我想要做的示例可能是轮廓笔划,或斜角/浮雕效果
我正在尝试模拟这种效果:http://meyerweb.com/eric/css/edge/complexspiral/demo.html在我的博客上:http://segment6.blogspot
我尝试将样式应用到 Accordion Pane ,但遇到了问题。 这行不通。 accordion.setEffect(new DropShadow(BlurType.ONE_PASS_BOX, Co
关于 Datatables website 的教程足够清楚了: 在我告诉 Datatables 我正在谈论哪一列后,我只需将切换按钮放入: column.visible( ! column.visib
我正在寻找 scratchOut 效果,随便叫它什么。 这是从前景中删除图像的效果,因此背景图像变得可见。 我曾尝试使用 jquery 插件重新创建此效果,但它并不像我希望的那样流畅。 有没有人有这种
本文实例讲述了android实现文字和图片混排(文字环绕图片)效果。分享给大家供大家参考,具体如下: 在平时我们做项目中,或许有要对一张图片或者某一个东西进行文字和图片说明,这时候要求排版美观,所
本文实例讲述了Javafx简单实现【我的电脑资源管理器】效果。分享给大家供大家参考。具体如下: 1. java代码: ?
我是 ngrx 的新手,正在尝试让我的 ngrx 商店的 @Effect 函数正常工作。下面的代码显示了如果我没有使用 ngrx 商店,服务是如何工作的。我首先调用 http.get 来获取列表,然后
基本上我搜索了很多,解决方案建议应用一些 PNG 掩码或不提供所需的解决方案。 我发现了什么。 ffmpeg -i main.mkv -i facecloseup.mkv -filter_compl
有关使用从商店中选择的状态的效果的 Ngrx 文档状态(没有双关语意) Note: For performance reasons, use a flattening operator like co
我有一个数据网格控件,我在其中使用名为 FastShadow 的自定义效果,它就像一个光晕。 我希望效果在其边界之外发光,这样很好,但是当我在顶部绘制另一个形状时,我不希望这个形状受到影响。在本例中,
除了子 div.exception 中的所有内容,我想将 div.main 中的所有文本设为灰色。 div.exception 应该看起来好像类 main 从未添加到父 div。 这可能吗?如果是这样
我有一个 PDF 文件,我想重现此包页面中的页面 curl 效果: https://pub.flutter-io.cn/packages/page_turn 我试过用这个 page_turn插件,它需
我想测试一个效果如下: 如果调度了 LoadEntriesSucces 操作,则效果开始 等待 5 秒 5 秒后发送 http 请求 当响应到达时,将分派(dispatch)新的操作(取决于响应是成功

我是一名优秀的程序员,十分优秀!