- Java锁的逻辑(结合对象头和ObjectMonitor)
- 还在用饼状图?来瞧瞧这些炫酷的百分比可视化新图形(附代码实现)⛵
- 自动注册实体类到EntityFrameworkCore上下文,并适配ABP及ABPVNext
- 基于Sklearn机器学习代码实战
配套演示工程 。
此项目中所用 proto 文件位于 ./proto 目录下,来源于 官方proto示例 。
此项目中所列所有模板case文件位于 ./tmpl 目录下 。
此教程均基于 markdown 文本演示 。
最近有通过 proto 文件生成其接口文档的需求,而 protoc-gen-doc 所生成的格式不能很好地满足需要。看到它支持自定义模板,但几乎没有一篇文章能详细解释该如何自定义,该用什么字段自定义,里面各种遍历、条件语句怎么写,如何取用 ServiceMethod Options 等.
经过近一天的梳理和踩坑,产出本文,记载了自定义模板所需的常用语法.
protoc-gen-doc 是一个用于生成 proto 的 protoc 插件,通过解析 proto 文件定义,快速生成多种类型的接口文档.
生成文档的原理,就是基于一个文件模板,通过解析 proto 文件的属性,填充到模板中指定位置。可以基于内置模板生成,也可以自定义模板使用.
内置模板支持:
protoc-gen-doc 二进制文件,使用时将传入此文件的路径。。为了演示方便,我在配套代码工程的根目录下放了一个 protoc-gen-doc 文件。
go get -u github.com/pseudomuto/protoc-gen-doc/cmd/protoc-gen-doc
                          protoc \
--plugin=protoc-gen-doc=./protoc-gen-doc \
--proto_path=./proto \
--proto_path=./third_party \
--doc_out=./out \
--doc_opt=markdown,index.md \
./proto/*.proto
参数解析:
--plugin : 指定 protoc-gen-doc,并指定 protoc-gen-doc 可执行文件的路径 --proto_path : 包含目标 proto 文件的目录路径,如果依赖了其他目录的 proto 文件,也要使用此参数指定其目录。例如 third_party 目录。 --doc_out : 接口文档的输出目录 --doc_opt : 指定待输出的文档模板和文件名 如果要指定自定义模型,则可修改 --doc_opt 的第一个参数.
例如,我在 ./tmpl 目录下自定义了模板文件 case1.tmpl ,则 --doc_opt 应设置为:
--doc_opt=./tmpl/case1.tmpl,index.md
官方在这里有两个简单的自定义模板,里面可见常用用法,但没有太多解释,想编写自己的自定义模板还是难度颇大。可供参考.
官方自定义模板示例 。
想要理解模板,就要将其中每个占位的参数所代表的含义.
模板中所有的占位参数,均可以在源码中找到: templates.go 。
这里不需要理解源码做了什么,不需要知道它是如何运行的,只需要看一个结构体:
                          type Template struct {
	// The files that were parsed
	Files []*File `json:"files"`
	// Details about the scalar values and their respective types in supported languages.
	Scalars []*ScalarValue `json:"scalarValueTypes"`
}
这就是从 proto 解析出的结构 Files 为一个文件,从 File 进入,可以见更多细节,亦可更深入 Services、Messages 查看.
                          type File struct {
	Name        string `json:"name"`
	Description string `json:"description"`
	Package     string `json:"package"`

	HasEnums      bool `json:"hasEnums"`
	HasExtensions bool `json:"hasExtensions"`
	HasMessages   bool `json:"hasMessages"`
	HasServices   bool `json:"hasServices"`

	Enums      orderedEnums      `json:"enums"`
	Extensions orderedExtensions `json:"extensions"`
	Messages   orderedMessages   `json:"messages"`
	Services   orderedServices   `json:"services"`

	Options map[string]interface{} `json:"options,omitempty"`
}
与官方示例进行对比便可发现,那些占位的字段,皆为这里所定义的字段。这里字段名名如其意,应该无需详解.
其中 Description 字段,对应的是 proto 文件中的注释。当注释写在 service 上方时,便可从 Service 结构的 Desctiption 字段读取.
另外,每个结构体还定义了诸多方法,也可以用于在自定义模板中调用。详情见后文.
主要以要生成的文档类型决定.
比如在 markdown 与 html 中, <!-- --> 无法被渲染出来,则可以用 <!-- --> 写注解 。
想获取到某个字段值,可以使用 {{}} 符号。在一个自定义模型文件中, 。
{{.}} 初始表示 Template 结构 。
{{.Files}} 表示输出 Template 的 Files 字段.
如果想要拿到单独一个 File 进行操作,就要使用 遍历语句 进行遍历.
从 Template 中遍历 Files 列表,如下所示:
                          <!-- case1.tmpl -->
{{range .Files}}
# {{.Name}}
{{.Description}}

{{.}}
{{end}}
上面例子,使用 {{Range .Files}} 表示遍历 Files 列表,到 {{end}} 处结束。在 range 和 end 之间, {{.}} 表示 File 的结构, {{.Name}} 即为 File.Name.
修改 --doc_opt=./tmpl/case1.tmpl,case1.md 参数,查看运行结果:
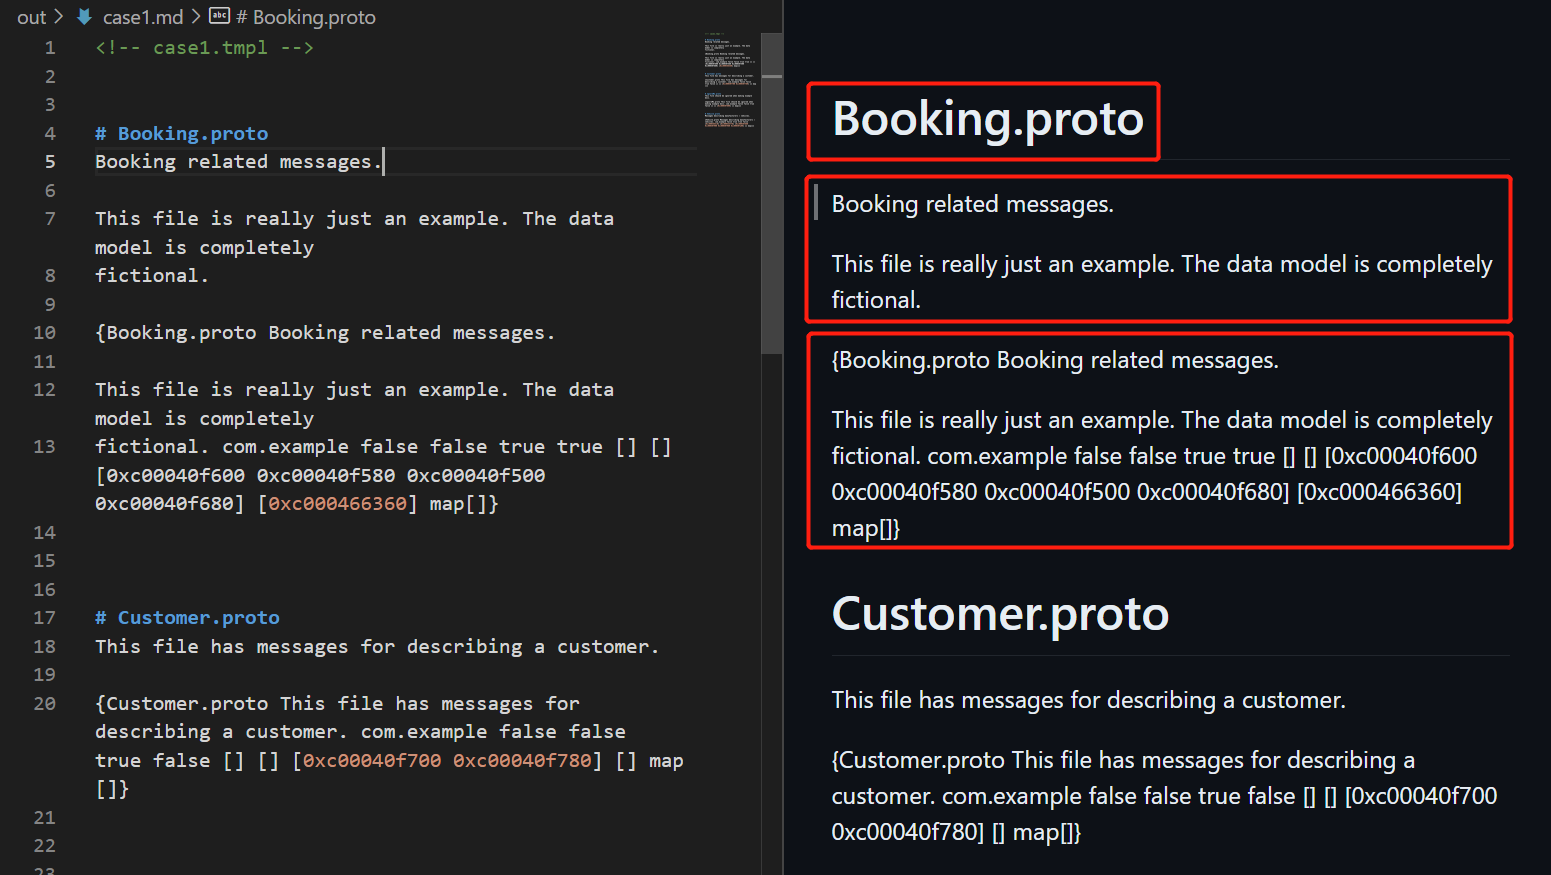
遍历语句非常常用,它是可以嵌套的,不光 File,连 Service、Message、ServiceMethod 等结构,都需要使用 Range 遍历进入,获取其内部结构.
例如,进入File,并进入 File.Services,打印 Service 的信息:
                          <!-- case2.tmpl -->
{{range .Files}}
# {{.Name}}
{{.Description}}

{{.}}

{{range .Services}}
## ServiceName: {{.Name}}
{{.Description}}

{{.}}
{{end}} <!-- end Services -->
{{end}} <!-- end Files -->
这里我们遍历打印了 Service.Name、Service.Description 和 Service 结构体 。
修改 --doc_opt=./tmpl/case2.tmpl,case2.md 参数,查看运行结果:
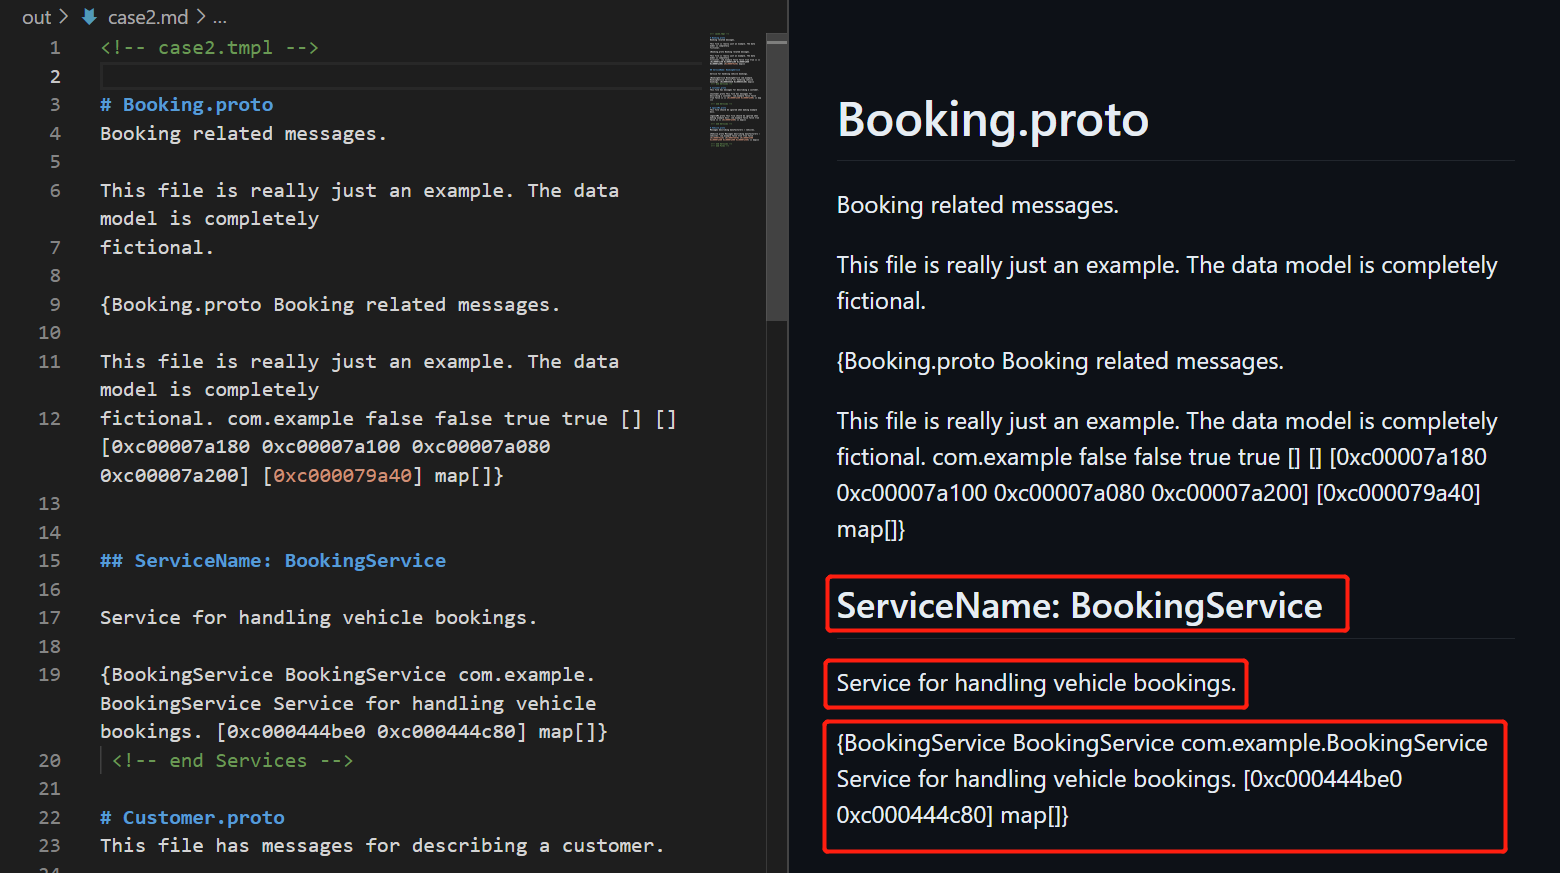
可以看到,每次 range 内部, {{.}} 都变成了 range 的目标列表的一个 Item。当 range 嵌套较多时,容易混淆。可以将 Item 赋值给一个参数,在之后使用参数进行调用.
基于 case2 进行改造:
                          <!-- case3.tmpl -->
{{range .Files}}
{{$file := .}}

# {{$file.Name}}
{{$file.Description}}

{{$file}}
{{range $file.Services}}
{{$service := .}}
## ServiceName: {{$service.Name}}
{{$service.Description}}

{{$service}}
{{end}} <!-- end Services -->
{{end}} <!-- end Files -->
查看运行结果,可以看到用了参数的 case3 结果与 case2 完全一致:
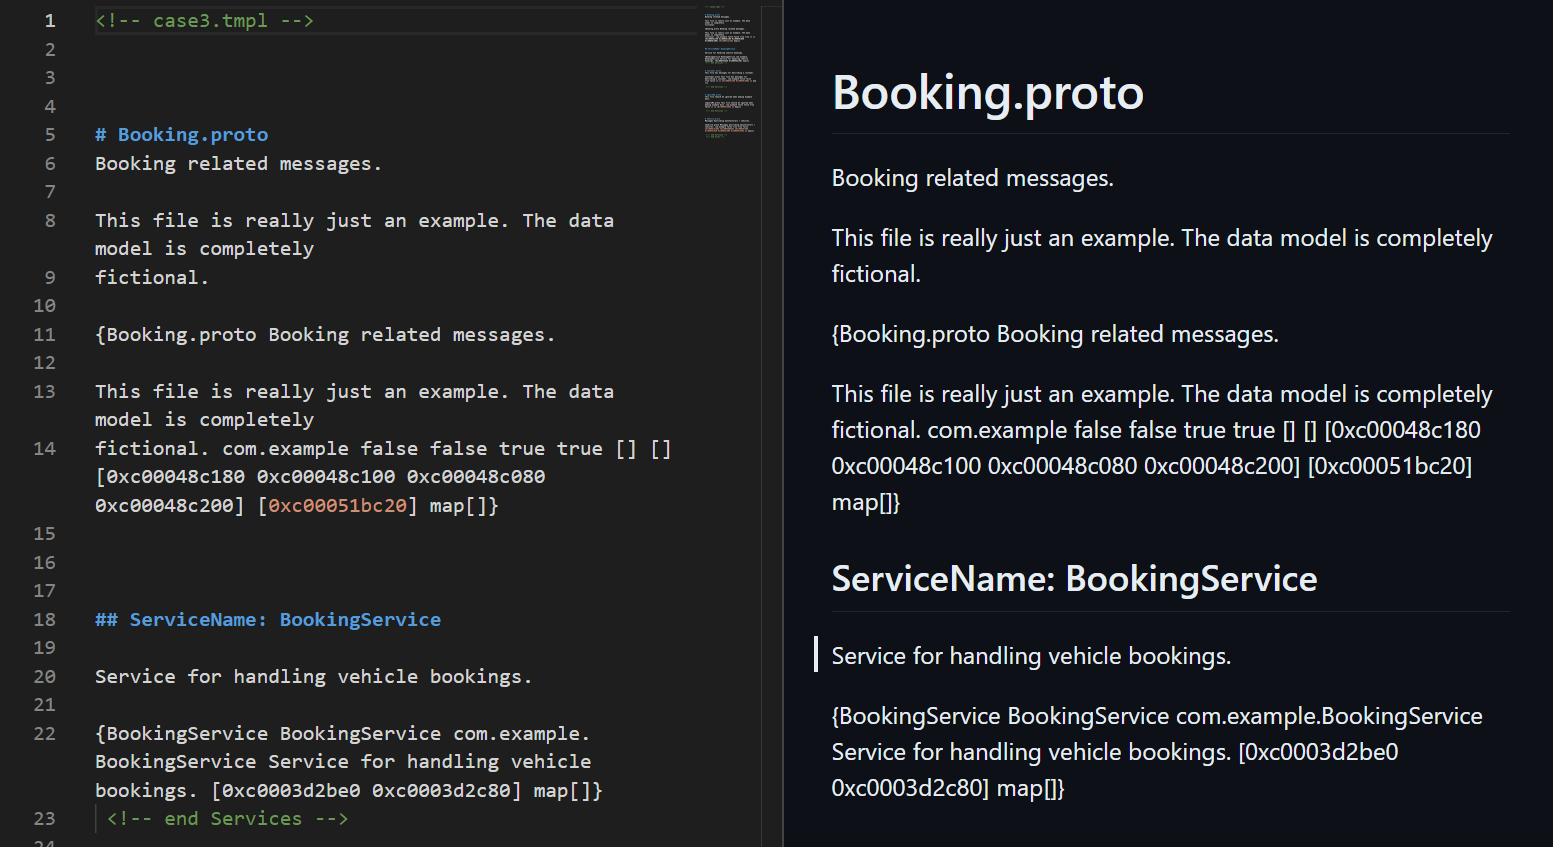
使用 {{if}} {{end}} ,也可以在其中加入 {{else}} 。
{{if}} 目前发现有两种用法:
                          {{if eq param1 param2}}
{{end}}

{{if boolParam}}
{{end}}
前者对比两个参数是否相等。后者判断 boolParam 是否为 true.
下面示例基于 case3,将判断 file.Name 是否等于 Booking.proto ,若是,则输出相关信息,否则输出 忽略 xxx 。
在 Booking.proto 中继续判断 HasServices 是否存在 service,如果存在则输出相关信息 。
                          <!-- case4.tmpl -->
{{range .Files}}
{{$file := .}}
{{if eq $file.Name "Booking.proto"}}
# {{$file.Name}}
{{$file.Description}}

{{$file}}
{{if $file.HasServices}}
{{range $file.Services}}
{{$service := .}}
## ServiceName: {{$service.Name}}

{{$service.Description}}

{{$service}}
{{end}} <!-- end Services -->
{{end}} <!-- end if -->
{{else}}
# 忽略 {{$file.Name}}
{{end}} <!-- end if else -->
{{end}} <!-- end Files -->
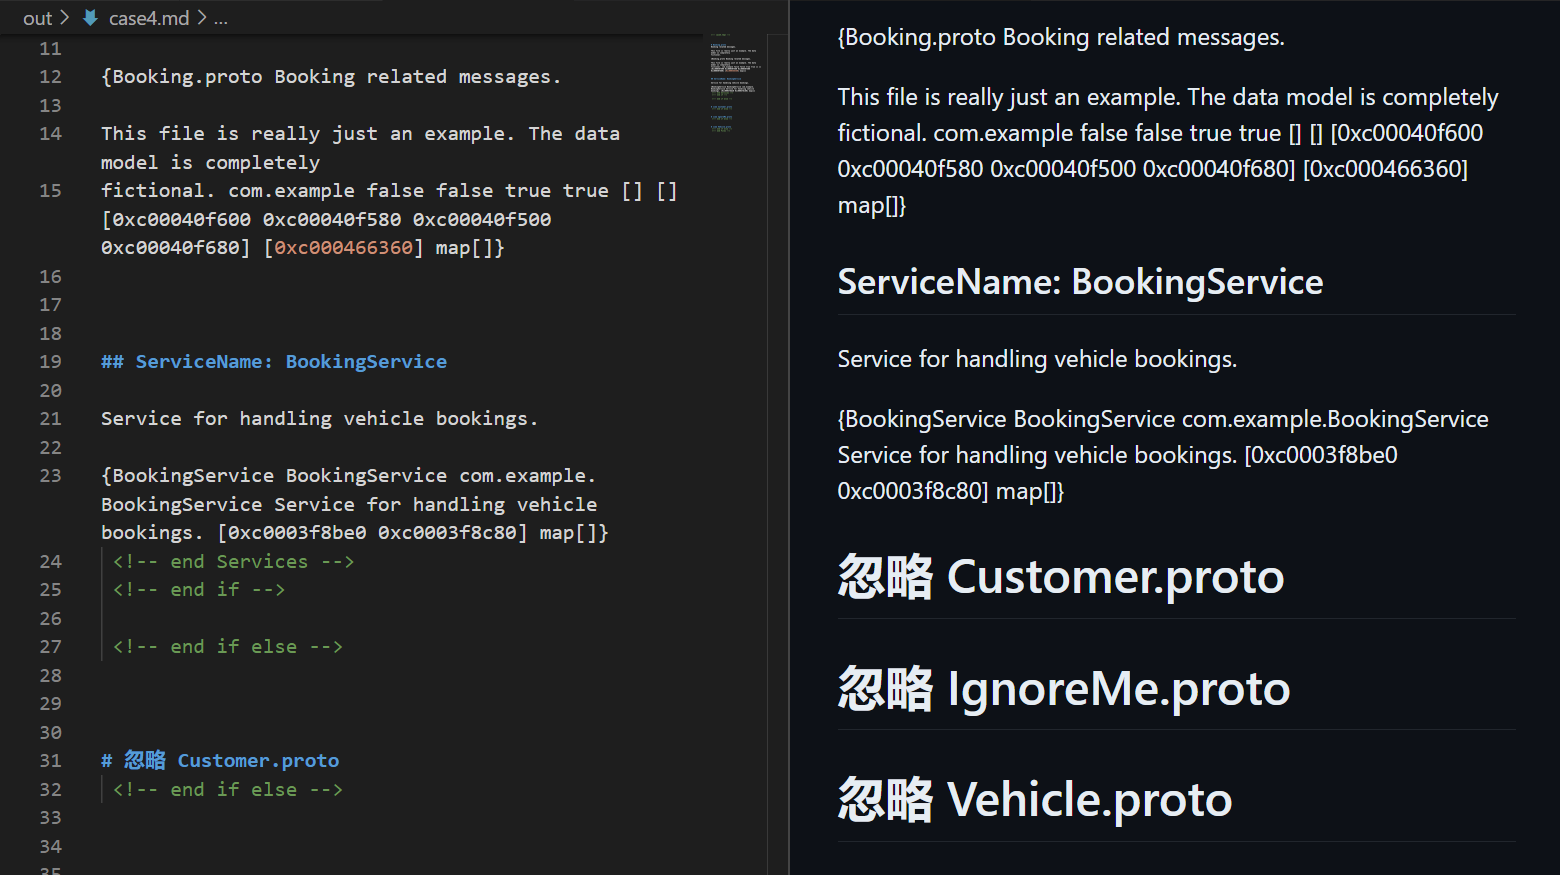
想知道某个函数的功能,还要亲自阅读一下源码关于各结构体函数的实现: templates.go 。
使用方式:
{{functionName params... }}
函数大多是用来读取 Options 内容的。几乎每个结构都有 Options,为 map[string]interface{} 结构.
比较常用的 Options,如下图对 Service 进行 http 的定义:
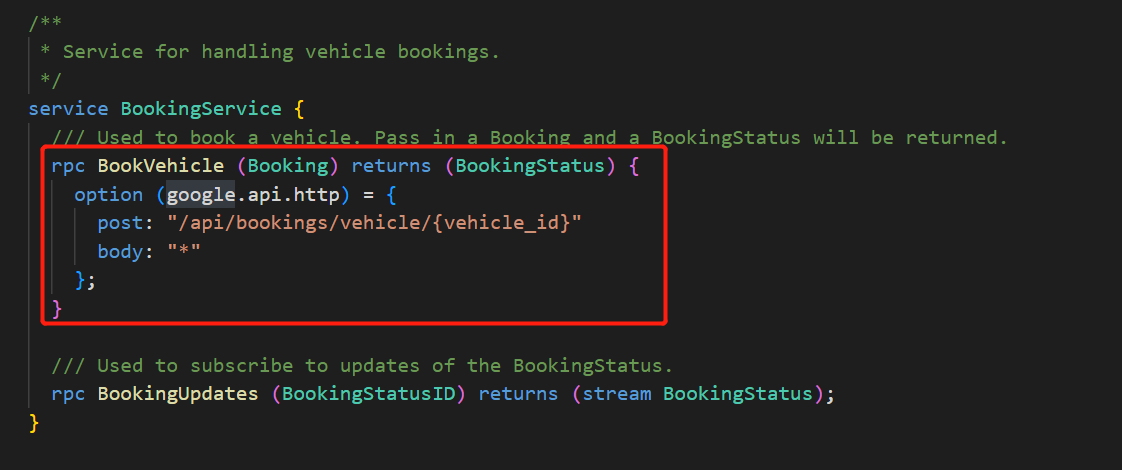
为了取出这里的 Options,可以使用 ServiceMethod 的 Option 方法.
基于 case3 进行改造:
                          <!-- case5.tmpl -->
{{range .Files}}
{{$file := .}}
# {{$file.Name}}
{{$file.Description}}

{{$file}}
{{range $file.Services}}
{{$service := .}}
## ServiceName: {{$service.Name}}
{{$service.Description}}
{{range $service.Methods}}
{{$method := .}}
### ServiceMethod: {{$method.Name}}
{{range ($method.Option "google.api.http").Rules}}
- {{.Method}}
- {{.Pattern}}
- \{{.Body}} <!-- body 为 * 时会被认为是 markdown 语法 -->
{{end}} <!-- end Rules -->
{{end}} <!-- end Methods -->
{{end}} <!-- end Services -->
{{end}} <!-- end Files -->
运行后结果
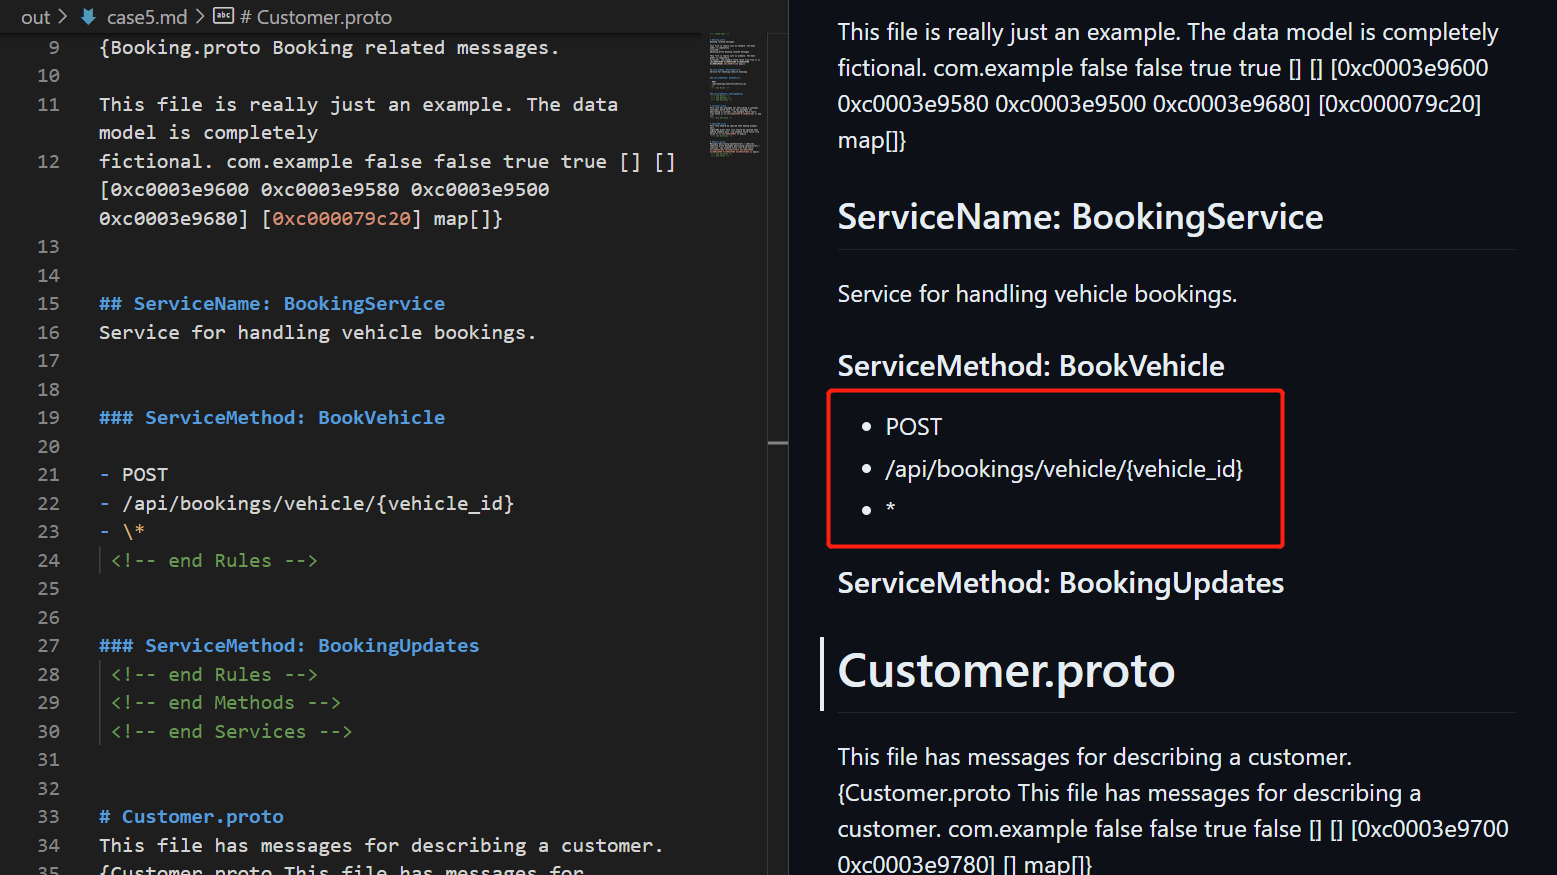
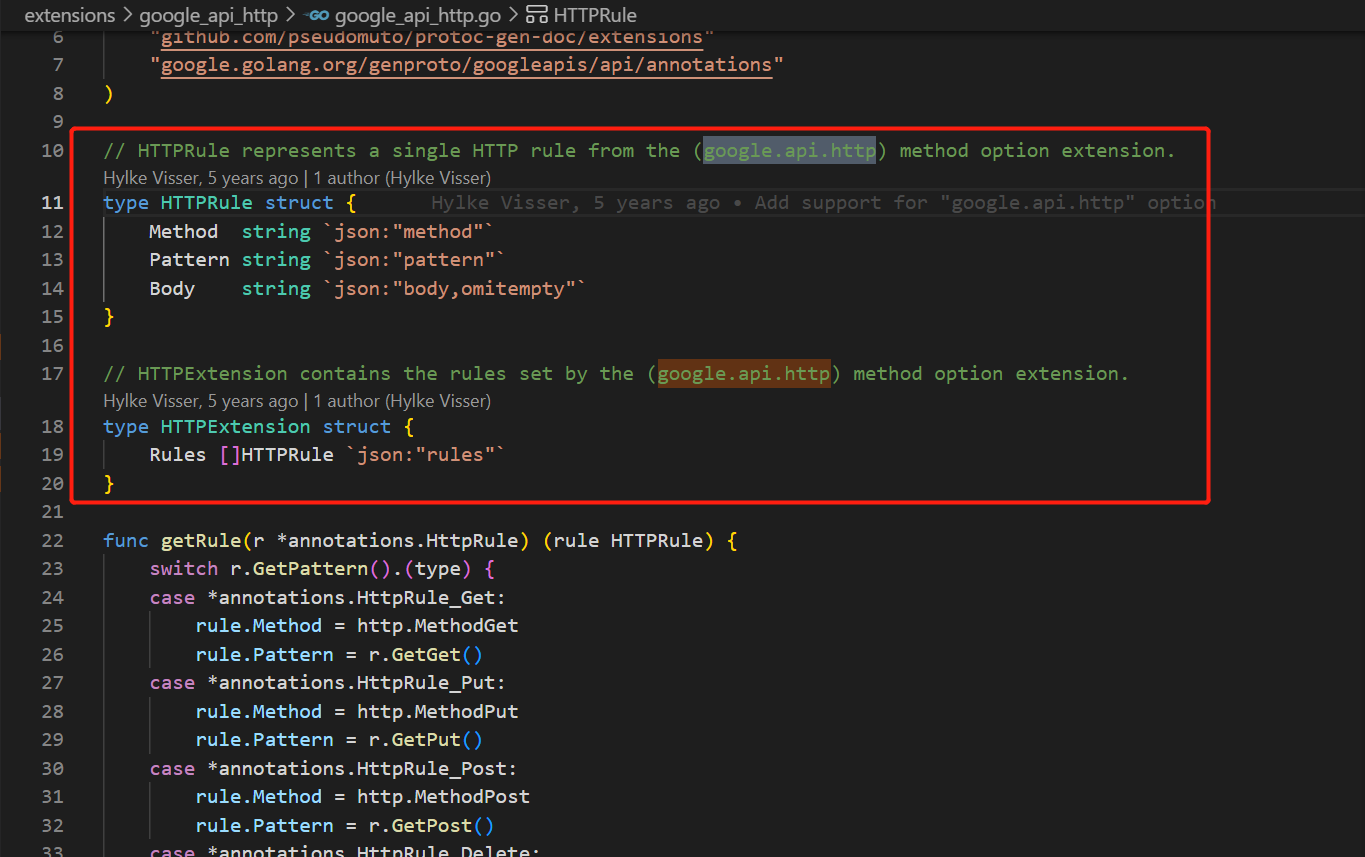
($method.Option "google.api.http").Rules 对取出的 interface{} 类型做了类型转换。为什么用 Rules 来转换,可以在 源码 中找到:
                          <!-- 设置默认值 -->
{{ .XXX | default ""}}

<!-- 取值小写 -->
{{ .XXX | lower}}

<!-- 替换 a 字符为空 -->
{{ .XXX | replace "a" ""}}

<!-- 取值小写并替换 a 字符为空 -->
{{ .XXX | lower | replace "a" ""}}
除此之外,还有不少其他用法,暂时没有更深入探索,但掌握以上已经能够满足自定义模板之需求.
如看者有其他补充,不胜感激.
最后此篇关于protoc-gen-doc自定义模板规则详解的文章就讲到这里了,如果你想了解更多关于protoc-gen-doc自定义模板规则详解的内容请搜索CFSDN的文章或继续浏览相关文章,希望大家以后支持我的博客! 。
全称“Java Virtual Machine statistics monitoring tool”(statistics 统计;monitoring 监控;tool 工具) 用于监控虚拟机的各种运
主要是讲下Mongodb的索引的查看、创建、删除、类型说明,还有就是Explain执行计划的解释说明。 可以转载,但请注明出处。
1>单线程或者单进程 相当于短链接,当accept之后,就开始数据的接收和数据的发送,不接受新的连接,即一个server,一个client 不存在并发。 2>循环服务器和并发服务器
详解 linux中的关机和重启命令 一 shutdown命令 shutdown [选项] 时间 选项: ?
首先,将json串转为一个JObject对象: ? 1
matplotlib官网 matplotlib库默认英文字体 添加黑体(‘SimHei')为绘图字体 代码: plt.rcParams['font.sans-serif']=['SimHei'
在并发编程中,synchronized关键字是常出现的角色。之前我们都称呼synchronized关键字为重量锁,但是在jdk1.6中对synchronized进行了优化,引入了偏向锁、轻量锁。本篇
一般我们的项目中会使用1到2个数据库连接配置,同程艺龙的数据库连接配置被收拢到统一的配置中心,由DBA统一配置和维护,业务方通过某个字符串配置拿到的是Connection对象。
实例如下: ? 1
1. MemoryCahe NetCore中的缓存和System.Runtime.Caching很相似,但是在功能上做了增强,缓存的key支持object类型;提供了泛型支持;可以读缓存和单个缓存
argument是javascript中函数的一个特殊参数,例如下文,利用argument访问函数参数,判断函数是否执行 复制代码 代码如下: <script
一不小心装了一个Redis服务,开了一个全网的默认端口,一开始以为这台服务器没有公网ip,结果发现之后悔之莫及啊 某天发现cpu load高的出奇,发现一个minerd进程 占了大量cpu,googl
今天写这个是为了 提醒自己 编程过程 不仅要有逻辑 思想 还有要规范 代码 这样可读性 1、PHP 编程规范与编码习惯最主要的有以下几点: 1 文件说明 2 funct
摘要:虚拟机安装时一般都采用最小化安装,默认没有lspci工具。一台测试虚拟网卡性能的虚拟机,需要lspci工具来查看网卡的类型。本文描述了在一个虚拟机中安装lspci工具的具体步骤。 由于要测试
1、修改用户进程可打开文件数限制 在Linux平台上,无论编写客户端程序还是服务端程序,在进行高并发TCP连接处理时,最高的并发数量都要受到系统对用户单一进程同时可打开文件数量的限制(这是因为系统
目录 算术运算符 基本四则运算符 增量赋值运算符 自增/自减运算符 关系运算符 逻
如下所示: ? 1
MapperScannerConfigurer之sqlSessionFactory注入方式讲解 首先,Mybatis中的有一段配置非常方便,省去我们去写DaoImpl(Dao层实现类)的时间,这个
Linux的网络虚拟化是LXC项目中的一个子项目,LXC包括文件系统虚拟化,进程空间虚拟化,用户虚拟化,网络虚拟化,等等,这里使用LXC的网络虚拟化来模拟多个网络环境。 本文从基本的网络设备讲
? 1

我是一名优秀的程序员,十分优秀!