
 个人中心
个人中心 文章发布
文章发布
作者热门文章
- Java锁的逻辑(结合对象头和ObjectMonitor)
- 还在用饼状图?来瞧瞧这些炫酷的百分比可视化新图形(附代码实现)⛵
- 自动注册实体类到EntityFrameworkCore上下文,并适配ABP及ABPVNext
- 基于Sklearn机器学习代码实战


 27
27
 4
4


大家好,我是一个初级的Python开发工程师。本文是结合官方教程和代码案例,简单说下我对flask-socketio的使用理解.
。
websocket 说白一点就是,建立客户端和服务端双向通讯通道, 服务器可以主动向客户端发消息.
。
1. 环境准备:Python3.7 。
                          pip

                            install

                           eventlet==

                            0.33

                          .

                            3


pip


                            install

                           flask-socketio==

                            5.8

                          .

                            0


pip


                            install

                           flask==

                            1.1

                          .

                            4
。
2. 代码来自官方教程 。
下面的代码亲测可用,请放心食用.
(1)项目结构 。
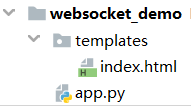
(2)app.py代码 。
from
threading
import
Lock
from
flask
import
Flask, render_template, session, request, copy_current_request_context
from
flask_socketio
import
SocketIO, emit, join_room, leave_room, close_room, rooms, disconnect
#
Set this variable to "threading", "eventlet" or "gevent" to test the
#
different async modes, or leave it set to None for the application to choose
#
the best option based on installed packages.
async_mode =
None
app
= Flask(
__name__
)
app.config[
'
SECRET_KEY
'
] =
'
secret!
'
socketio
= SocketIO(app, async_mode=
async_mode)
thread
=
None
thread_lock
=
Lock()
def
background_thread():
"""
Example of how to send server generated events to clients.
"""
count
=
0
while
True:
socketio.sleep(
10
)
count
+= 1
socketio.emit(
'
my_response
'
,
{
'
data
'
:
'
Server generated event
'
,
'
count
'
: count})
@app.route(
'
/
'
)
def
index():
return
render_template(
'
index.html
'
, async_mode=
socketio.async_mode)
@socketio.event
def
my_event(message):
session[
'
receive_count
'
] = session.get(
'
receive_count
'
, 0) + 1
emit(
'
my_response
'
,
{
'
data
'
: message[
'
data
'
],
'
count
'
: session[
'
receive_count
'
]})
@socketio.event
def
my_broadcast_event(message):
session[
'
receive_count
'
] = session.get(
'
receive_count
'
, 0) + 1
emit(
'
my_response
'
,
{
'
data
'
: message[
'
data
'
],
'
count
'
: session[
'
receive_count
'
]},
broadcast
=
True)
@socketio.event
def
join(message):
join_room(message[
'
room
'
])
session[
'
receive_count
'
] = session.get(
'
receive_count
'
, 0) + 1
emit(
'
my_response
'
,
{
'
data
'
:
'
In rooms:
'
+
'
,
'
.join(rooms()),
'
count
'
: session[
'
receive_count
'
]})
@socketio.event
def
leave(message):
leave_room(message[
'
room
'
])
session[
'
receive_count
'
] = session.get(
'
receive_count
'
, 0) + 1
emit(
'
my_response
'
,
{
'
data
'
:
'
In rooms:
'
+
'
,
'
.join(rooms()),
'
count
'
: session[
'
receive_count
'
]})
@socketio.on(
'
close_room
'
)
def
on_close_room(message):
session[
'
receive_count
'
] = session.get(
'
receive_count
'
, 0) + 1
emit(
'
my_response
'
, {
'
data
'
:
'
Room
'
+ message[
'
room
'
] +
'
is closing.
'
,
'
count
'
: session[
'
receive_count
'
]},
to
=message[
'
room
'
])
close_room(message[
'
room
'
])
@socketio.event
def
my_room_event(message):
session[
'
receive_count
'
] = session.get(
'
receive_count
'
, 0) + 1
emit(
'
my_response
'
,
{
'
data
'
: message[
'
data
'
],
'
count
'
: session[
'
receive_count
'
]},
to
=message[
'
room
'
])
@socketio.event
def
disconnect_request():
@copy_current_request_context
def
can_disconnect():
disconnect()
session[
'
receive_count
'
] = session.get(
'
receive_count
'
, 0) + 1
#
for this emit we use a callback function
#
when the callback function is invoked we know that the message has been
#
received and it is safe to disconnect
emit(
'
my_response
'
,
{
'
data
'
:
'
Disconnected!
'
,
'
count
'
: session[
'
receive_count
'
]},
callback
=
can_disconnect)
@socketio.event
def
my_ping():
emit(
'
my_pong
'
)
@socketio.event
def
connect():
global
thread
with thread_lock:
if
thread
is
None:
thread
=
socketio.start_background_task(background_thread)
emit(
'
my_response
'
, {
'
data
'
:
'
Connected
'
,
'
count
'
: 0})
@socketio.on(
'
disconnect
'
)
def
test_disconnect():
print
(
'
Client disconnected
'
, request.sid)
if
__name__
==
'
__main__
'
:
socketio.run(app, host
=
'
0.0.0.0
'
, debug=True)
(3)index.html代码 。
<!
DOCTYPE HTML
>
<
html
>
<
head
>
<
title
>
Flask-SocketIO Test
</
title
>
<
script
src
="https://cdnjs.cloudflare.com/ajax/libs/jquery/3.5.1/jquery.min.js"
integrity
="sha512-bLT0Qm9VnAYZDflyKcBaQ2gg0hSYNQrJ8RilYldYQ1FxQYoCLtUjuuRuZo+fjqhx/qtq/1itJ0C2ejDxltZVFg=="
crossorigin
="anonymous"
></
script
>
<
script
src
="https://cdnjs.cloudflare.com/ajax/libs/socket.io/3.0.4/socket.io.js"
integrity
="sha512-aMGMvNYu8Ue4G+fHa359jcPb1u+ytAF+P2SCb+PxrjCdO3n3ZTxJ30zuH39rimUggmTwmh2u7wvQsDTHESnmfQ=="
crossorigin
="anonymous"
></
script
>
<
script
type
="text/javascript"
charset
="utf-8"
>
$(document).ready(
function
() {
//
Connect to the Socket.IO server.
//
The connection URL has the following format, relative to the current page:
//
http[s]://<domain>:<port>[/<namespace>]
var
socket
=
io.connect(
'
http://
'
+
document.domain
+
'
:
'
+
location.port);
//
Event handler for new connections.
//
The callback function is invoked when a connection with the
//
server is established.
socket.on(
'
connect
'
,
function
() {
socket.emit(
'
my_event
'
, {data:
'
I\'m connected!
'
});
});
//
Event handler for server sent data.
//
The callback function is invoked whenever the server emits data
//
to the client. The data is then displayed in the "Received"
//
section of the page.
socket.on(
'
my_response
'
,
function
(msg, cb) {
$(
'
#log
'
).append(
'
<br>
'
+
$(
'
<div/>
'
).text(
'
Received #
'
+
msg.count
+
'
:
'
+
msg.data).html());
if
(cb)
cb();
});
//
Interval function that tests message latency by sending a "ping"
//
message. The server then responds with a "pong" message and the
//
round trip time is measured.
var
ping_pong_times
=
[];
var
start_time;
window.setInterval(
function
() {
start_time
=
(
new
Date).getTime();
$(
'
#transport
'
).text(socket.io.engine.transport.name);
socket.emit(
'
my_ping
'
);
},
1000
);
//
Handler for the "pong" message. When the pong is received, the
//
time from the ping is stored, and the average of the last 30
//
samples is average and displayed.
socket.on(
'
my_pong
'
,
function
() {
var
latency
=
(
new
Date).getTime()
-
start_time;
ping_pong_times.push(latency);
ping_pong_times
=
ping_pong_times.slice(
-
30
);
//
keep last 30 samples
var
sum
=
0
;
for
(
var
i
=
0
; i
<
ping_pong_times.length; i
++
)
sum
+=
ping_pong_times[i];
$(
'
#ping-pong
'
).text(Math.round(
10
*
sum
/
ping_pong_times.length)
/
10
);
});
//
Handlers for the different forms in the page.
//
These accept data from the user and send it to the server in a
//
variety of ways
$(
'
form#emit
'
).submit(
function
(event) {
socket.emit(
'
my_event
'
, {data: $(
'
#emit_data
'
).val()});
return
false
;
});
$(
'
form#broadcast
'
).submit(
function
(event) {
socket.emit(
'
my_broadcast_event
'
, {data: $(
'
#broadcast_data
'
).val()});
return
false
;
});
$(
'
form#join
'
).submit(
function
(event) {
socket.emit(
'
join
'
, {room: $(
'
#join_room
'
).val()});
return
false
;
});
$(
'
form#leave
'
).submit(
function
(event) {
socket.emit(
'
leave
'
, {room: $(
'
#leave_room
'
).val()});
return
false
;
});
$(
'
form#send_room
'
).submit(
function
(event) {
socket.emit(
'
my_room_event
'
, {room: $(
'
#room_name
'
).val(), data: $(
'
#room_data
'
).val()});
return
false
;
});
$(
'
form#close
'
).submit(
function
(event) {
socket.emit(
'
close_room
'
, {room: $(
'
#close_room
'
).val()});
return
false
;
});
$(
'
form#disconnect
'
).submit(
function
(event) {
socket.emit(
'
disconnect_request
'
);
return
false
;
});
});
</
script
>
</
head
>
<
body
>
<
h1
>
Flask-SocketIO Test
</
h1
>
<
p
>
Async mode is:
<
b
>
{{ async_mode }}
</
b
><
br
>
Current transport is:
<
b
><
span
id
="transport"
></
span
></
b
><
br
>
Average ping/pong latency:
<
b
><
span
id
="ping-pong"
></
span
>
ms
</
b
>
</
p
>
<
h2
>
Send:
</
h2
>
<
form
id
="emit"
method
="POST"
action
='#'
>
<
input
type
="text"
name
="emit_data"
id
="emit_data"
placeholder
="Message"
>
<
input
type
="submit"
value
="Echo"
>
</
form
>
<
form
id
="broadcast"
method
="POST"
action
='#'
>
<
input
type
="text"
name
="broadcast_data"
id
="broadcast_data"
placeholder
="Message"
>
<
input
type
="submit"
value
="Broadcast"
>
</
form
>
<
form
id
="join"
method
="POST"
action
='#'
>
<
input
type
="text"
name
="join_room"
id
="join_room"
placeholder
="Room Name"
>
<
input
type
="submit"
value
="Join Room"
>
</
form
>
<
form
id
="leave"
method
="POST"
action
='#'
>
<
input
type
="text"
name
="leave_room"
id
="leave_room"
placeholder
="Room Name"
>
<
input
type
="submit"
value
="Leave Room"
>
</
form
>
<
form
id
="send_room"
method
="POST"
action
='#'
>
<
input
type
="text"
name
="room_name"
id
="room_name"
placeholder
="Room Name"
>
<
input
type
="text"
name
="room_data"
id
="room_data"
placeholder
="Message"
>
<
input
type
="submit"
value
="Send to Room"
>
</
form
>
<
form
id
="close"
method
="POST"
action
="#"
>
<
input
type
="text"
name
="close_room"
id
="close_room"
placeholder
="Room Name"
>
<
input
type
="submit"
value
="Close Room"
>
</
form
>
<
form
id
="disconnect"
method
="POST"
action
="#"
>
<
input
type
="submit"
value
="Disconnect"
>
</
form
>
<
h2
>
Receive:
</
h2
>
<
div
id
="log"
></
div
>
</
body
>
</
html
>
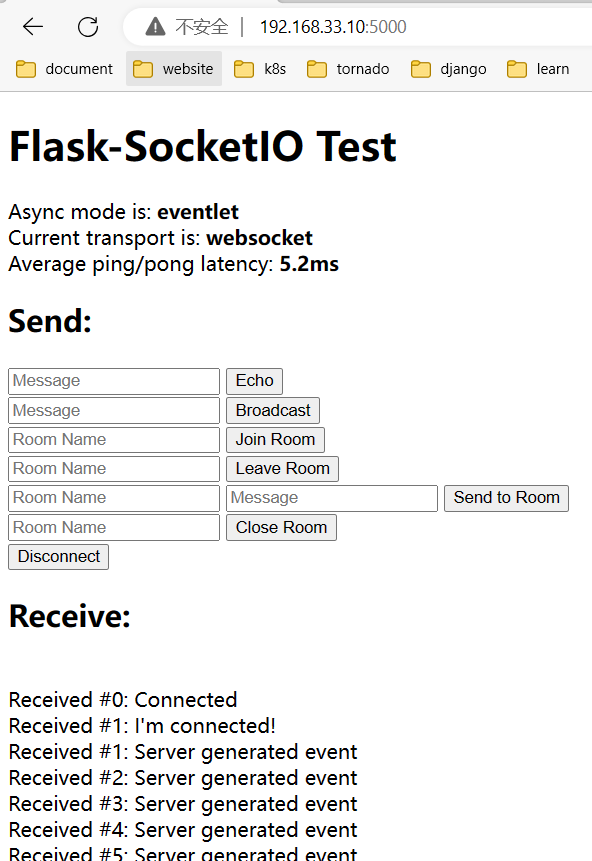
(4)运行app.py代码,浏览器访问5000端口,如下:
。
(5)代码理解(最重要的部分!!!) 。
flask-socketio包的常用方法理解:
1. socketio.on和socketio.event是等价 的,都是用来定义事件处理器(event handlers)的。区别是 .on的第一个参数是事件名称(event name),.event没有这个参数,而是使用被装饰的函数名作为事件名称。其他参数是一样的。 事件名称 connect / disconnect / message / json 都是SocketIO生成的特殊事件名, 任何其他的事件名都被视为自定义事件 。其他参数还有namespace(命名空间).
2. send和emit都被服务器用来向客户端发送消息。 send直接发送消息,emit需要指定事件和消息。 一般情况下,都是使用emit指定事件名发送消息。 emit的其他参数有:
A. namespace(命名空间),和事件名配合使用。默认为"/".
B. broadcast(广播模式True/False),是否向所有客户端Client发送消息.
C. to,通常为room_id,发送给指定房间的所有用户.
D. callback(回调函数),指定回调函数,发送到另一端执行.
启动后的运行流程理解:
1. 启动时的初始运行流程。 客户端访问http://host:5000后,触发index.html里面的js代码,客户端执行了后, 。
                              var

                           socket = io.connect('http://' + document.domain + ':' + location.port);
客户端和后台服务器建立了连接,注意,此时先触发服务器端的代码:
                            @socketio.event


                            def


                             connect():


                            global


                             thread
    with thread_lock:


                            if

                           thread

                            is


                             None:
            thread

                          =

                             socketio.start_background_task(background_thread)
    emit(


                            '


                            my_response


                            '

                          , {

                            '


                            data


                            '

                          :

                            '


                            Connected


                            '

                          ,

                            '


                            count


                            '

                          : 0})
然后紧接着触发了客户端的代码:
                          socket.on('connect',

                            function


                            () {
                socket.emit(

                          'my_event', {data: 'I\'m connected!'

                            });
            });
所以,浏览器请求的web页面 Receive部分: 先是 Received #0: Connected, 再是 Received #1: I'm connected! 。
。
2. 接下来,看看 浏览器请求的web页面 Send部分:
(1)echo:输入123,浏览器会向服务器端的my_event事件处理器发送数据{"data": 123} 。
socket.emit('my_event', {data: $('#emit_data').val()});
服务器端的my_event事件处理器为:
                            @socketio.event


                            def


                             my_event(message):
    session[


                            '


                            receive_count


                            '

                          ] = session.get(

                            '


                            receive_count


                            '

                          , 0) + 1


    emit(


                            '


                            my_response


                            '


                            ,
         {


                            '


                            data


                            '

                          : message[

                            '


                            data


                            '

                          ],

                            '


                            count


                            '

                          : session[

                            '


                            receive_count


                            '

                          ]})
可以看到, 服务器端在接收到数据后,又向客户端的my_response事件处理器发送数据。 在看看index.html里的my_response事件处理器是如何定义的:
                          socket.on('my_response',

                            function


                            (msg, cb) {
                $(

                          '#log').append('<br>' + $('<div/>').text('Received #' + msg.count + ': ' +

                             msg.data).html());


                            if


                             (cb)
                    cb();
            });
最终,浏览器的web页面显示为 Received #2: 123。通过这个例子,也充分展示了websocket的功能,服务端和客户端都主动可以向另一端发送数据。这是有别于http的。http协议只能客户端发起请求,服务端响应请求。服务端无法主动向客户端发送数据.
(2)broadcast暂时不说了.
(3)Join Room:这个和Leave Room是成对使用的。就像一个聊天室一样,加入指定聊天室后,当执行Send to Room,就可以接收这个房间内的所有消息.
(4)Close Room:关闭房间 。
(5)Disconnect:客户端主动断开连接,客户端触发服务端的disconnect_request事件处理器, 。
                            #


                             客户端


socket.emit(

                            '


                            disconnect_request


                            '


                            );


                            #


                             服务端


@socketio.event


                            def


                             disconnect_request():
    @copy_current_request_context


                            def


                             can_disconnect():
        disconnect()
    session[


                            '


                            receive_count


                            '

                          ] = session.get(

                            '


                            receive_count


                            '

                          , 0) + 1


                            #


                             for this emit we use a callback function


                            #


                             when the callback function is invoked we know that the message has been


                            #


                             received and it is safe to disconnect


    emit(

                            '


                            my_response


                            '


                            ,
         {


                            '


                            data


                            '

                          :

                            '


                            Disconnected!


                            '

                          ,

                            '


                            count


                            '

                          : session[

                            '


                            receive_count


                            '


                            ]},
         callback

                          =can_disconnect)
服务端收到请求后,会向客户端的my_response事件处理器发送数据,同时发送一个callback回调函数can_disconnect,让客户端执行该函数.
最终浏览器的页面显示: Received #2: Disconnected.
。
至此,你应该已经对使用flask-socketio库有了基本的认识了。如果还有不了解的,可以留言交流.
在 生产环境中,还需要添加异常处理,比如socketio.on_error()和socketio.on_error_default().
本文只是入门使用教程,感兴趣的话请大家自行查文档深入理解.
。
附上 官方教程链接 :
1. https://blog.miguelgrinberg.com/post/easy-websockets-with-flask-and-gevent 。
2. https://flask-socketio.readthedocs.io/en/latest/index.html 。
最后此篇关于【websocket】小白快速上手flask-socketio的文章就讲到这里了,如果你想了解更多关于【websocket】小白快速上手flask-socketio的内容请搜索CFSDN的文章或继续浏览相关文章,希望大家以后支持我的博客! 。
27
4
 0
0
我正在遵循Flask-potion教程并尝试保护我的api。我一直试图找出如何在User端点上设置权限,以使一个User无法查看另一个User的记录。这是我的代码: class UserResourc
项目设置 Python 3.5.3 flask 0.12.2 目录 . ├── Core │ ├── BackgroundProcessManager.py │ ├── FirebaseDat
我正在构建 flask 应用程序并决定这次尝试应用程序工厂方法,但是遇到了 flask 迁移的麻烦并且无法找出简单的解决方案。 请注意,我想将配置位置作为选项传递给脚本 管理.py: manager
我尝试通过以下示例代码来熟悉Flask-APScheduler插件:https://github.com/viniciuschiele/flask-apscheduler/blob/master/ex
我一周前刚刚了解了 Flask 和 JWT,所以我真的需要一些帮助。有人可以解释一下flask-jwt和flask-jwt-extended之间的区别吗? 最佳答案 Flask-JWT 没有那么多功能
我是 Flask 的新手,我只是想用它创建一个简单的市场。我的网站上有三种类型的用户 [卖家、买家、管理员]。我认为每种类型的用户都应该有自己的注册和登录,因为他们的角色应该提供不同类型的信息。另一方
基本上,我想做一些非常简单的事情:我想创建一个用于删除数据库中条目的表单。 模板正在创建一个包含所有条目的html表,没有任何麻烦。我现在的问题是:如何将其转换为每行都有链接的表单。 当然,我可以通过
我对Flask来说非常陌生,其中一个基本要求是我需要SEO友好的URL。 我说一条路线 @app.route('/sales/') @app.route(/sales/) def get_sales(
一直在为用户管理系统开发Flask-user,但是我看不到自定义登录页面和注册页面的方法。我使用pip安装了flask-user pip install flask-user 任何帮助,将不胜感激 最
我有一个奇怪的情况,不知道如何找到问题。 我已经创建了一个这样的蓝图 reportjobsmod = Blueprint('jobreports', __name__, url_prefix='/jo
我认为在 Flask 中拥有实例变量的正确方法是添加用户和 session ,但我正在尝试测试一个概念,我还不想经历所有这些。我试图让一个网络应用程序将图像加载到一个变量中,然后可以对其执行不同的图像
select = SelectField("City") form.select.choices = [(places['name'], places['name']) for places in p
这个问题在这里已经有了答案: Provide extra information to Flask's app.logger (2 个回答) 3年前关闭。 我正在运行一个 flask 应用程序。我想写
我当时正在编程一个非常不错的api,使用json从游戏服务器到我的网站空间获取一些json数据, 但是每次我使用angular发送请求时,我都会得到以下信息:127.0.0.1--[20 / Mar
我已经开发了一个上传表单,以将特定的.xlsx文件作为上传。要求是要处理非xlsx上载的任何异常(例如zip,exe文件)。我正在使用pyexcel库读取上传内容。我尝试创建以下代码来处理此异常: e
我使用此功能在网站上捕获404错误: @app.errorhandler(404) def page_not_found(e): logger.warning('User raised an
我正在尝试同时使用 Flask Restful 和 Flask SocketIO。我已经制作了一个 Flask Restful 应用程序,但现在我想使用 Flask SocketIO 在客户端和我的服
我有一些 Flask 应用程序,我通过设置 FLASK_APP 来运行它们。环境变量和调用 flask run .自 FLASK_DEBUG也设置了,每当我更改一些代码时,应用程序都可以方便地重新加载
我目前正在使用 Flask 构建一个应用程序。我正在努力访问 Flask 实例“app”以及 Flask-mail 实例“mail”。 下面是我的项目的样子: └── my-project ├
Remember-me是 parameter flask_login.login_user(user, remember=False, duration=None, force=False, fres

我是一名优秀的程序员,十分优秀!