
 个人中心
个人中心 文章发布
文章发布
作者热门文章
- Java锁的逻辑(结合对象头和ObjectMonitor)
- 还在用饼状图?来瞧瞧这些炫酷的百分比可视化新图形(附代码实现)⛵
- 自动注册实体类到EntityFrameworkCore上下文,并适配ABP及ABPVNext
- 基于Sklearn机器学习代码实战


 25
25
 4
4


https://gitee.com/Kindear/lucy-chat 。
lucy-chat 是接入 OpenAI-ChatGPT 大模型人工智能的 Java 解决方案,大模型人工智能的发展是不可阻挡的趋势,我们环境无法创造工具,但是也要更好的使用工具,该包简化了接入流程,可以非常方便的引入并使用 ChatGPT 相关功能.
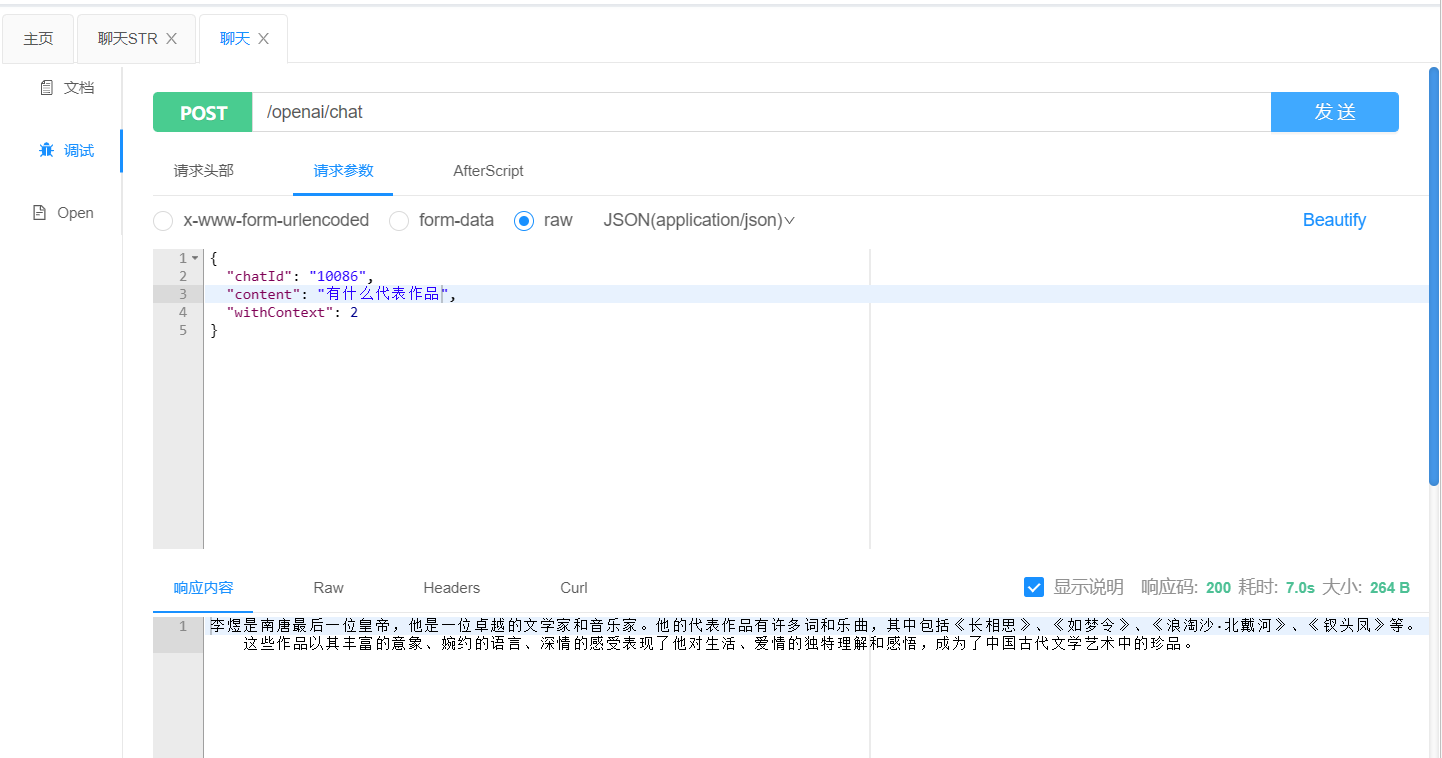
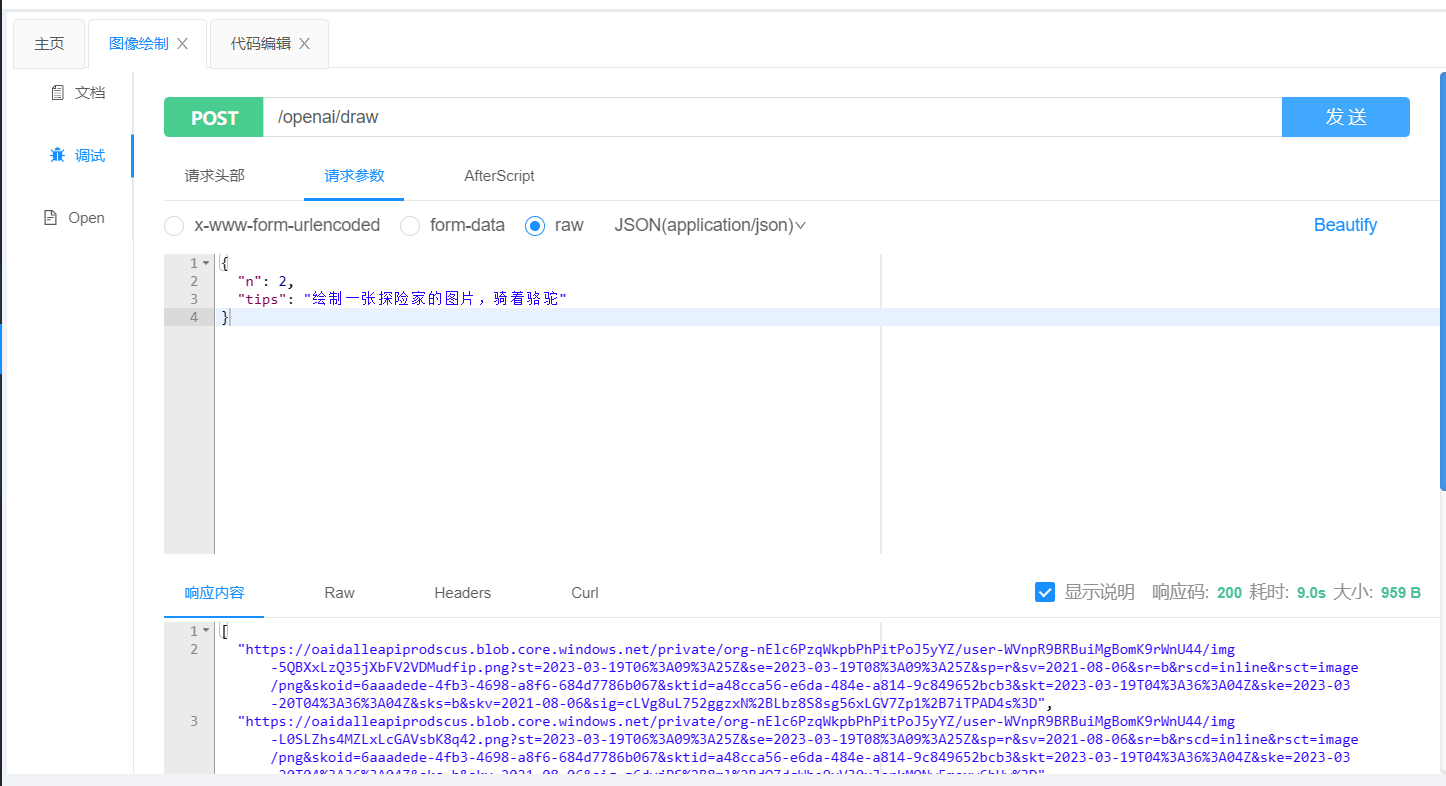
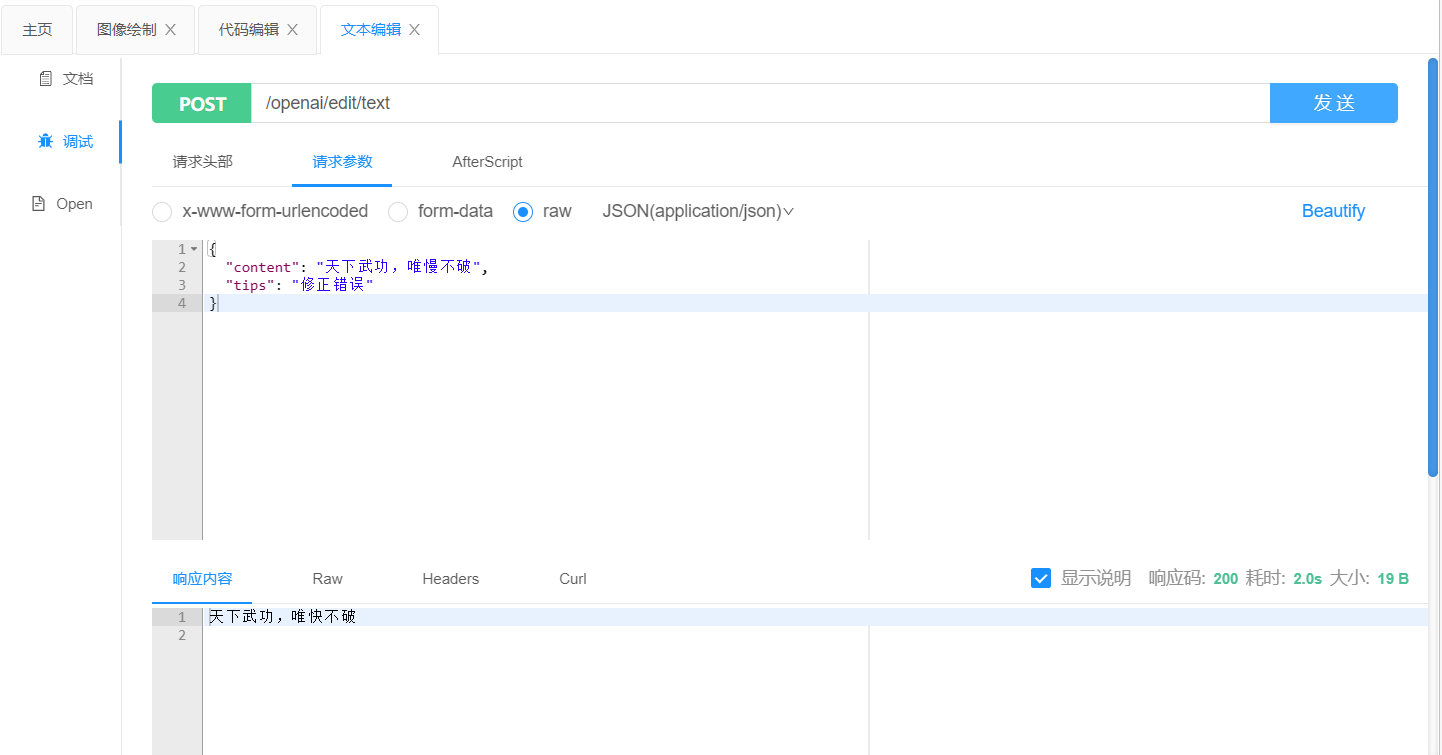
lucy-chat 提供了两种形式接入服务,完成集成或者独立部署后可以访问 [部署地址]/doc.html 调用相关接口.
准备 。
在引入任何 Lucy 系列依赖之前,需要完成 jitpack 镜像仓库的配置.
                          <repositories>
        <repository>
            <id>jitpack.io</id>
            <url>https://www.jitpack.io</url>
        </repository>
</repositories>
引入 。
根据版本号引入 。
当前默认 1.0.0-r4 。
                          		<dependency>
			<groupId>com.gitee.kindear</groupId>
			<artifactId>lucy-chat</artifactId>
			<version>${version}</version>
		</dependency>
启动类 。
启用 knife4j 文档,需要在启动类上配置 @EnableKnife4j 。
                          @EnableKnife4j
@SpringBootApplication
public class DemoApplication {

    public static void main(String[] args) {

        SpringApplication.run(LucyAdminApplication.class, args);
    }

}
配置文件 。
使用 lucy-chat 需要配置如下文件信息 。
                          spring.application.name=lucy-chat
# 运行端口
server.port=8080
# swagger 匹配
spring.mvc.pathmatch.matching-strategy=ant_path_matcher

# chat-gpt api-key
# 申请地址 https://platform.openai.com/account/api-keys
openai.chat.key=

# chat-gpt proxy host
# 配置代理地址 请参阅 https://www.v2ex.com/t/921689
openai.chat.host=

# 连接池最大连接数
forest.max-connections=1000
# 连接超时时间,单位为毫秒
forest.connect-timeout=30000
# 数据读取超时时间,单位为毫秒
forest.read-timeout=30000
git clone https://gitee.com/Kindear/lucy-chat
POM 文件中打包方式,即恢复 <build> 相关注释掉的内容
                          <build>
        <plugins>
            <plugin>
                <groupId>org.apache.maven.plugins</groupId>
                <artifactId>maven-compiler-plugin</artifactId>
                <version>3.8.1</version>
                <configuration>
                    <source>1.8</source>
                    <target>1.8</target>
                    <encoding>UTF-8</encoding>
                </configuration>

            </plugin>
            <plugin>
                <groupId>org.springframework.boot</groupId>
                <artifactId>spring-boot-maven-plugin</artifactId>
                <version>${spring-boot.version}</version>
                <executions>
                    <execution>
                        <goals>
                            <goal>repackage</goal>
                        </goals>
                    </execution>
                </executions>
            </plugin>
        </plugins>
    </build>
key 为私人 key ,随时会被替换。 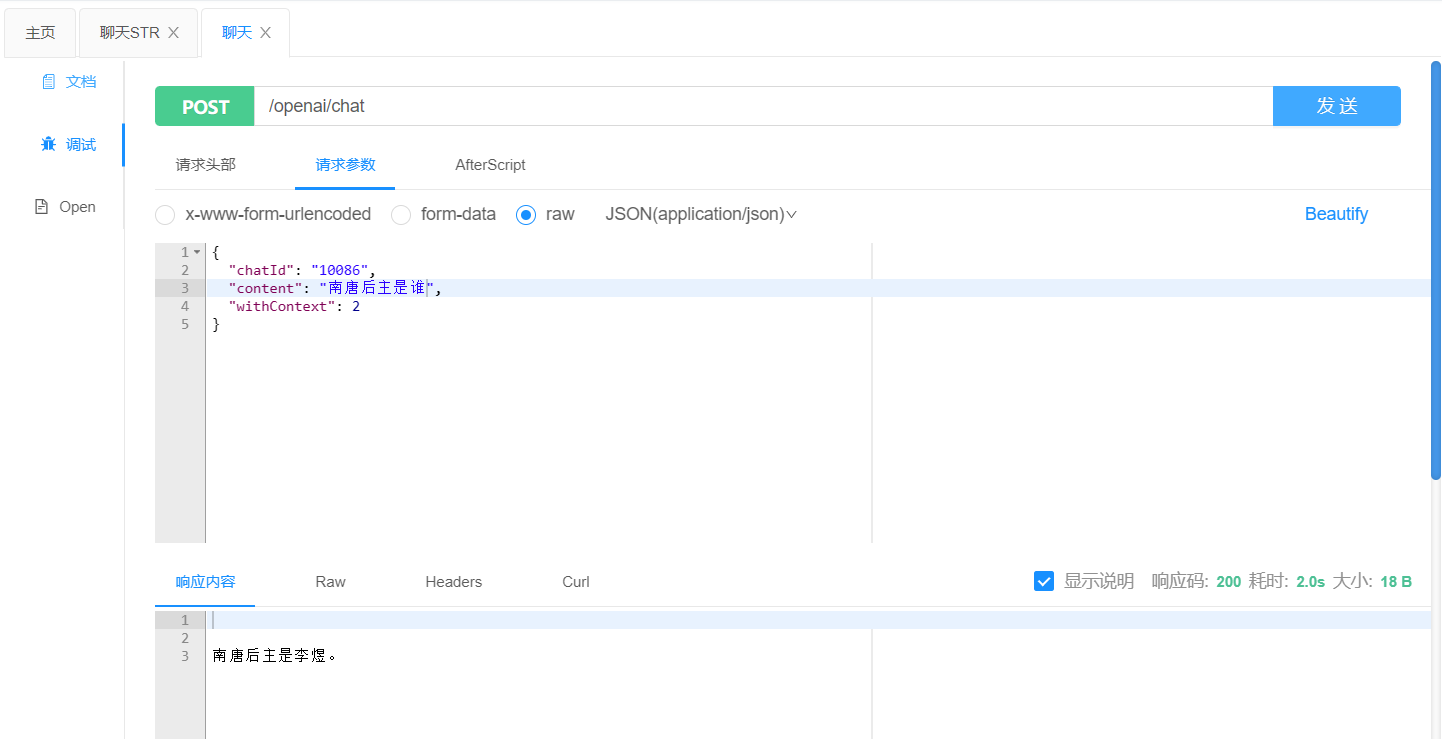
最后此篇关于springboot接入ChatGPT的文章就讲到这里了,如果你想了解更多关于springboot接入ChatGPT的内容请搜索CFSDN的文章或继续浏览相关文章,希望大家以后支持我的博客! 。
25
4
 0
0
SpringBoot-Admin 服务监控 简单介绍 Spring Boot Actuator 是 Spring Boot 自带的一个功能模块, 提供了一组已经开箱即用的生产环境下常用
我想查找通过关键字匹配字段 nameEnglish 或 nameChinese 的模型列表。我花了一个多小时谷歌搜索但我做不到。请帮忙。 Springboot Mongo 入门示例 https://s
(请注意:在调查 this issue 时,我更好地发现了我在此处介绍的问题根源) 我对 Hibernate 和 SpringBoot 非常陌生。我的项目涉及一个搜索引擎,其中索引(javafx 客户
我最近有一个 Web 应用程序从 springboot 升级到 springboot 2。当我将其部署到 Tomcat 8 时,它似乎启动了,但没有完全启动。 在 localhost.2019-09-
我是 Spring boot 的新手...我在运行 Controller 时遇到问题, Description: Field todoService in com.springboot.todoCon
我有一个SpringBoot应用程序,它使用以下配置与PostgreSQL通信,通过AWS Beanstrik部署:。在我将AWS Aurora证书更新为rds-ca-ecc384-g1之前,一切都很
一、介绍 在实际的软件系统开发过程中,由于业务的需求,在代码层面实现数据的脱敏还是远远不够的,往往还需要在数据库层面针对某些关键性的敏感信息,例如:身份证号、银行卡号、手机号、工资等信息进行加密存储
Selenium Selenium是一个用于Web应用程序自动化测试的开源工具套件。它主要用于以下目的: 浏览器自动化:Selenium能够模拟真实用户在不同浏览器(如Chrome、Fire
一、简介 在实际的项目开发过程中,经常需要用到邮件通知功能。例如,通过邮箱注册,邮箱找回密码,邮箱推送报表等等,实际的应用场景非常的多。 早期的时候,为了能实现邮件的自动发送功能,通常会使用 Ja
SpringBoot:基于redis自定义注解实现后端接口防重复提交校验 一、添加依赖 org.springframework.boot spring
SpringBoot:使用Jackson完成全局序列化配置 一、测试准备 com.fasterxml.jackson.core jackson-cor
springboot:整合rocketmq 一、简易消息操作 生产者整合mq 导入依赖 org.springframework.boot
springboot:常用注解 一、spring常用注解 包扫描+组件标注注解 @Component:泛指各种组件 @Controller、@Service、@Repository都可以称为@Comp
我们经常需要在两个系统之间进行一些数据的交互,这时候我们就需要开发数据交互接口。 一般来说,遇到比较多的接口有HTTP接口、WebService接口、FTP文件传输。今天我要来学习一下在SpringB
背景 近期项目上线,甲方要求通过安全检测才能进行验收,故针对扫描结果对系统进行了一系列的安全加固,本文对一些常见的安全问题及防护策略进行介绍,提供对应的解决方案 跨站脚本攻击 XSS常发生于论坛评论等
1.排除 Spring-boot-starter 默认的日志配置 将原本的 spring-boot-starter 改为 org.springframework.boot
springboot:解决跨域问题 一、跨域简介 URL的组成: // 协议 + 域名(子域名 + 主域名) + 端口号 + 资源地址 http://www.baidu.com:8080/ 只要协
一、自定义Starter 的思路: 创建一个Maven工程,创建三个模块 一个模块为demo-app,一个模块为demo-module,一个模块为demo-module-springboot-star
1.pom.xml 4.0.0 org.springframework.boot spring-boot-starter-parent
1.pom.xml 4.0.0 org.springframework.boot spring-boot-starter-parent

我是一名优秀的程序员,十分优秀!